Arduino Project 59- Digital voltmeter measuring from 0 to 30V
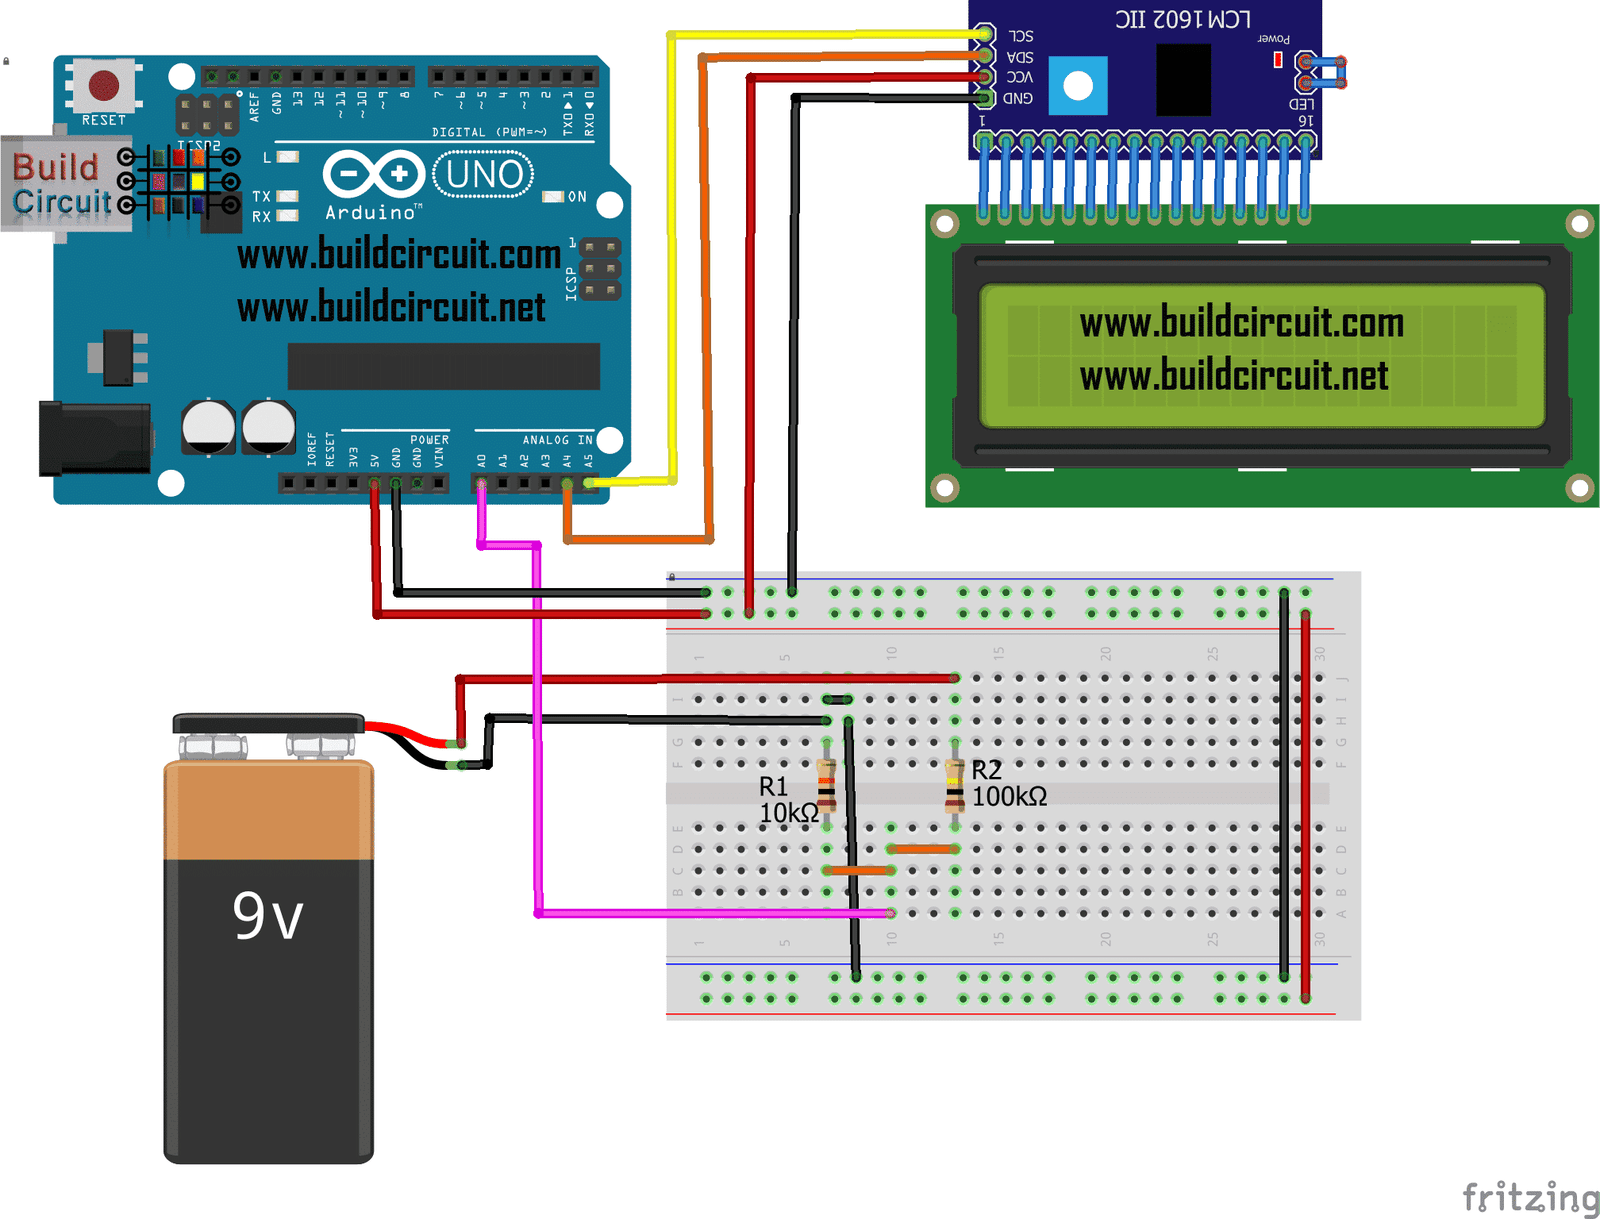
In this tutorial, we will build a circuit with Arduino Uno that can read voltages from 0 to 30V DC and display them on the 16×2 display, the ideal project to build our DIY voltmeter.
Thanks to the analogue inputs, that can be used to measure voltages from 0 to 5V. For higher values we will use a voltage divider formed by 2 resistors in series, and we will measure the voltage of the central node connecting it to the analog input A0.
Arduino converts the voltage detected on the analog Pin and converts it into digital format so that it can be processed by the microcontroller.
All that remains is to create the voltage divider with the two resistors and connect the display following the diagram below.
Sketch for I2C LCD:
16×2 LCD sketch
🛠️ Dive into our collection of DIY Kits, 🔊 Audio Amplifiers, Digital Scoreboards, FM transmitters, and more!
🎶 Explore endless possibilities at our new store.