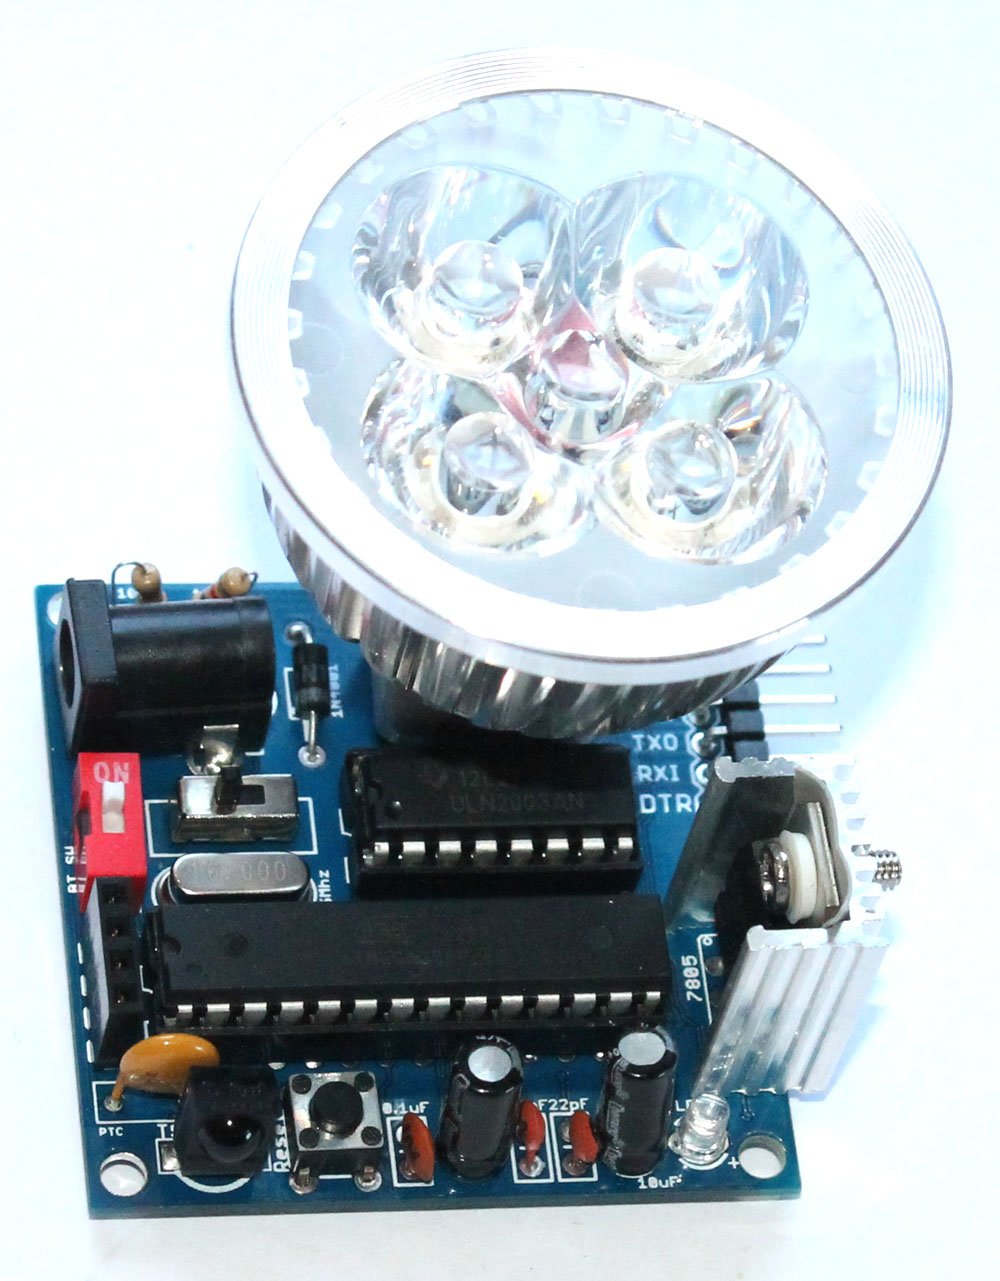
Amarino LED Lamp

Amarino Lamp is a versatile programmable LED lamp based on Arduino. The lamp has an inbuilt Arduino as its controller. PWM signals from Arduino are fed into UNL2003A and this chip controls the LED lamp. You can also simultaneously control the lamp with an infrared remote control. It has the following features:

  • Android app controlled: The LED lamp can be controlled with several Android applications made for controlling Arduino or communicating with Arduino via Bluetooth. We have tested the kit with Amarino toolkit and many other Android applications.
  • Bluetooth support: The control signals from Android phone are sent to the lamp via Bluetooth. There is a Bluetooth module connected to the circuit board that facilitates communication between Android and Arduino.
  • TSOP4838 infrared sensor: There is a TSOP4838 infrared sensor on the circuit board which allows you to control the lamp with any kind of TV/DVD remote control.
  • Fully programmable: The lamp is fully programmable because it has an inbuilt Arduino. You will need an FTDI breakout board to program the chip on the board. The kit package includes the FTDI basic breakout board.
  • Resettable PTC fuse: The lamp has a resettable PTC fuse which protects the circuit board from over current flow. In this kit, if the circuit tries to draw more than 500mA of current (if you have a bad short for instance) the PTC would ‘trip’ (by heating up). The increased resistance (trip state) would break the circuit and allow only a small leakage current.

Specification of lamp(according to the manufacturer): This is not the specification of whole circuit.

lamp image

MR16 4W LED Lamp
Lamp base MR16
Power 4W
Voltage 12V AC/DC
Lumens 400-500LM
Beam angle 45°
Dimension diameter 48mm x 61mm high
Weight 37g
Life time more than 50000 hours
Color temperature Cool white:5700-6300K

The kit package includes:

android lamp- main-small

The kit package includes everything that you need to build the LED lamp. On the assembly tutorial page you will get the list of components.

“The kit package does not include 12V/500mA power supply. You need to buy it separately”.

A 12V power supply with 500mA or 1A output is enough for this lamp.

You can buy similar to this one: 12V DC Power Adapter Supply 2.1mm 1A, CCTV

We do not sell that because different countries have different plug standards, so, we cannot stock that for all countries, not even Australia.

List of components is available on the assembly tutorial page.

About ULN2003:

Download datasheet

The ULN2003A is a high-voltage high-current darlington transistor array. The chip consists of seven npn darlington pairs that feature high-voltage outputs with common cathode clamp diodes for switching inductive loads. The collector-current rating of a single darlington pair is 500mA.

Because ULN2003 can drive 500mA, we chose MR16 4W LED lamp that can be driven easily by ULN2003A.

Schematic:

Smart phone lamp

How does it work ?

“You can simultaneously use Android phone application and IR remote control to operate the LED lamp.”

Bluetooth mode: 

The Bluetooth module on the kit is paired up with the Bluetooth of phone and control commands are sent from the phone application. The commands are interpreted by the Arduino UNO microcontroller and ULN2003 is driven to operate the LED lamp.

Infrared mode:

Infrared signals are sent from the infrared remote control and those signals are interpreted by Arduino UNO chip and control commands are sent to the ULN2003 to drive the LED lamp.

Using Amarino toolkit application

You can try several Amarino related experiments with this lamp.

Amarino_logo-W490

Step 1: Download Amarino main application from Amarino website(www.amarino-toolkit.net) and install it on your Android phone. Optional link (use this if the previous link does not work)

amarino main app

Step 2:  Download Meet Android Library and copy it to the Libraries folder of Arduino. Optional link

meet android

Step 3: Upload this sketch to the Atmega328P-PU Arduino UNO chip that’s on the circuit board. You will also need a library for remote control function, download the library and copy it to the libraries folder of Arduino.

Download Infrared sensor library from the original link 

Step 4: Connect the Bluetooth module to the circuit board. Please note how the Bluetooth module has been stacked over the 4 pin female header. And remember to SWITCH ON the circuit board. After you switch on the circuit board, you will see a red LED blinks on the Bluetooth module. Use a 12V (500mA/1A) power supply to power up the lamp.

bluetooth module  REMEMBER: Switch ON the 1P DIP RED color switch also. This switch:1-position-2p-side-style-dip-switch-red. Turning it on makes connection between the Bluetooth module and the microcontroller. But, this switch should be turned off while uploading a sketch.

Step 18- Fix a Bluetooth module over the 4 pin female headerSee how the  Bluetooth module has been stacked.

Then, activate the Bluetooth function of your phone

Amarino Nano (2)

Step 5: After you see an LED blinking on the Bluetooth module, open the Amarino Main application, you see the following interface:

Amarino Nano (1)

On the Amarino main application interface, press Add BT Device. That will display the Bluetooth module close to your Android phone.

Amarino Nano (3)

Select the HC-06 Bluetooth module. Remember to note down the MAC ID. In this example, the MAC ID is 98:D3:31:70:35:94. You will need this MAC ID in the next step. Note that the MAC ID is unique for all modules. It is never same for any two Bluetooth modules.

Now, you need to pair up your phone with the Bluetooth module. So, your phone will prompt a box for entering the pairing code. Pairing up with the Bluetooth module is a one time task.

Amarino Nano (9)

Enter the pairing code: 1234

After entering the pairing code, you will see the Bluetooth module listed on the Amarino application.

Amarino Nano (5)

Press Connect button to make Bluetooth connection between your phone and the Bluetooth module. As soon as the phone and module are connected, the red LED on the module stops blinking.

Step 6: Install this application for controlling the LED lamp.

LED lamp

Step 7: Enter the MAC ID of the Bluetooth module that you noted down in the previous step. In this example, it is 98:D3:31:70:35:94. Then, press Set Device ID.

Android Lamp (2)

Step 8: After you enter the MAC ID of the Bluetooth module, you will reach to this interface. Bluetooth module will be connected automatically to the Bluetooth of your phone.

Android Lamp

Step 9: Control the LED lamp with the slider and simultaneously control it with ANY remote control.

Watch the video below:

Where can you buy ?

buildcircuit      etsy

Control the lamp using general Android application

There are hundreds of applications on Google Play that have been made for Arduino and Android application. You can pick up any of those apps and control the LED lamp.

In this example, we have picked up this application which transmits text ‘h’ every time the green button is pressed. We have programmed it in such a way that the LED lamp is switched on if the Arduino gets an ‘h’.


TIP: If you want to know what text a random Android app sends to Arduino, you can check out this tutorial. The tutorial shows you what Arduino receives from the phone and what Arduino sends to the phone. See this video also.


The lamp is fully programmable. So, you can use your regular Arduino programming interface to program the lamp in anyway you want. Please remember to switch off the red DIP Bluetooth switch while programming, otherwise, the chip cannot be programmed. You should switch it back again after the chip has been programmed. 

Step 1: Install this Android application from Google Play.

external app

Step 2: Upload this sketch to your Arduino. This sketch is for controlling the lamp with Android app and infrared remote control at the same time. If you want to exclude the infrared sensor, you can upload this sketch. You can use an FTDI basic breakout board to program the kit. The breakout board is included in the kit package.

If you intend to control the lamp with infrared remote control, then, you need to download the library and copy it to the libraries folder of Arduino.

Download Infrared sensor library from the original link 

Step 3: Open the Android application and search for the Bluetooth module stacked on the circuit board. Pair up the module with your Android application. Pairing code= 1234. You need to pair up with the module only once.

Step 4: Switch on/off the lamp with the application. You can simultaneously control the lamp with your infrared remote control also.

Watch the video below:


Three interesting experiments:


Related documents: 

 Where can you buy ?

You can buy the lamp on www.buildcircuit.net, Ebay and Etsy.

buildcircuit      etsy

Search for products

Back to Top
Product has been added to your cart