


Amarino Lamp- Assembly tutorial
If you come to this page randomly from a search engine, please check this page first, you will eventually come back to this page.
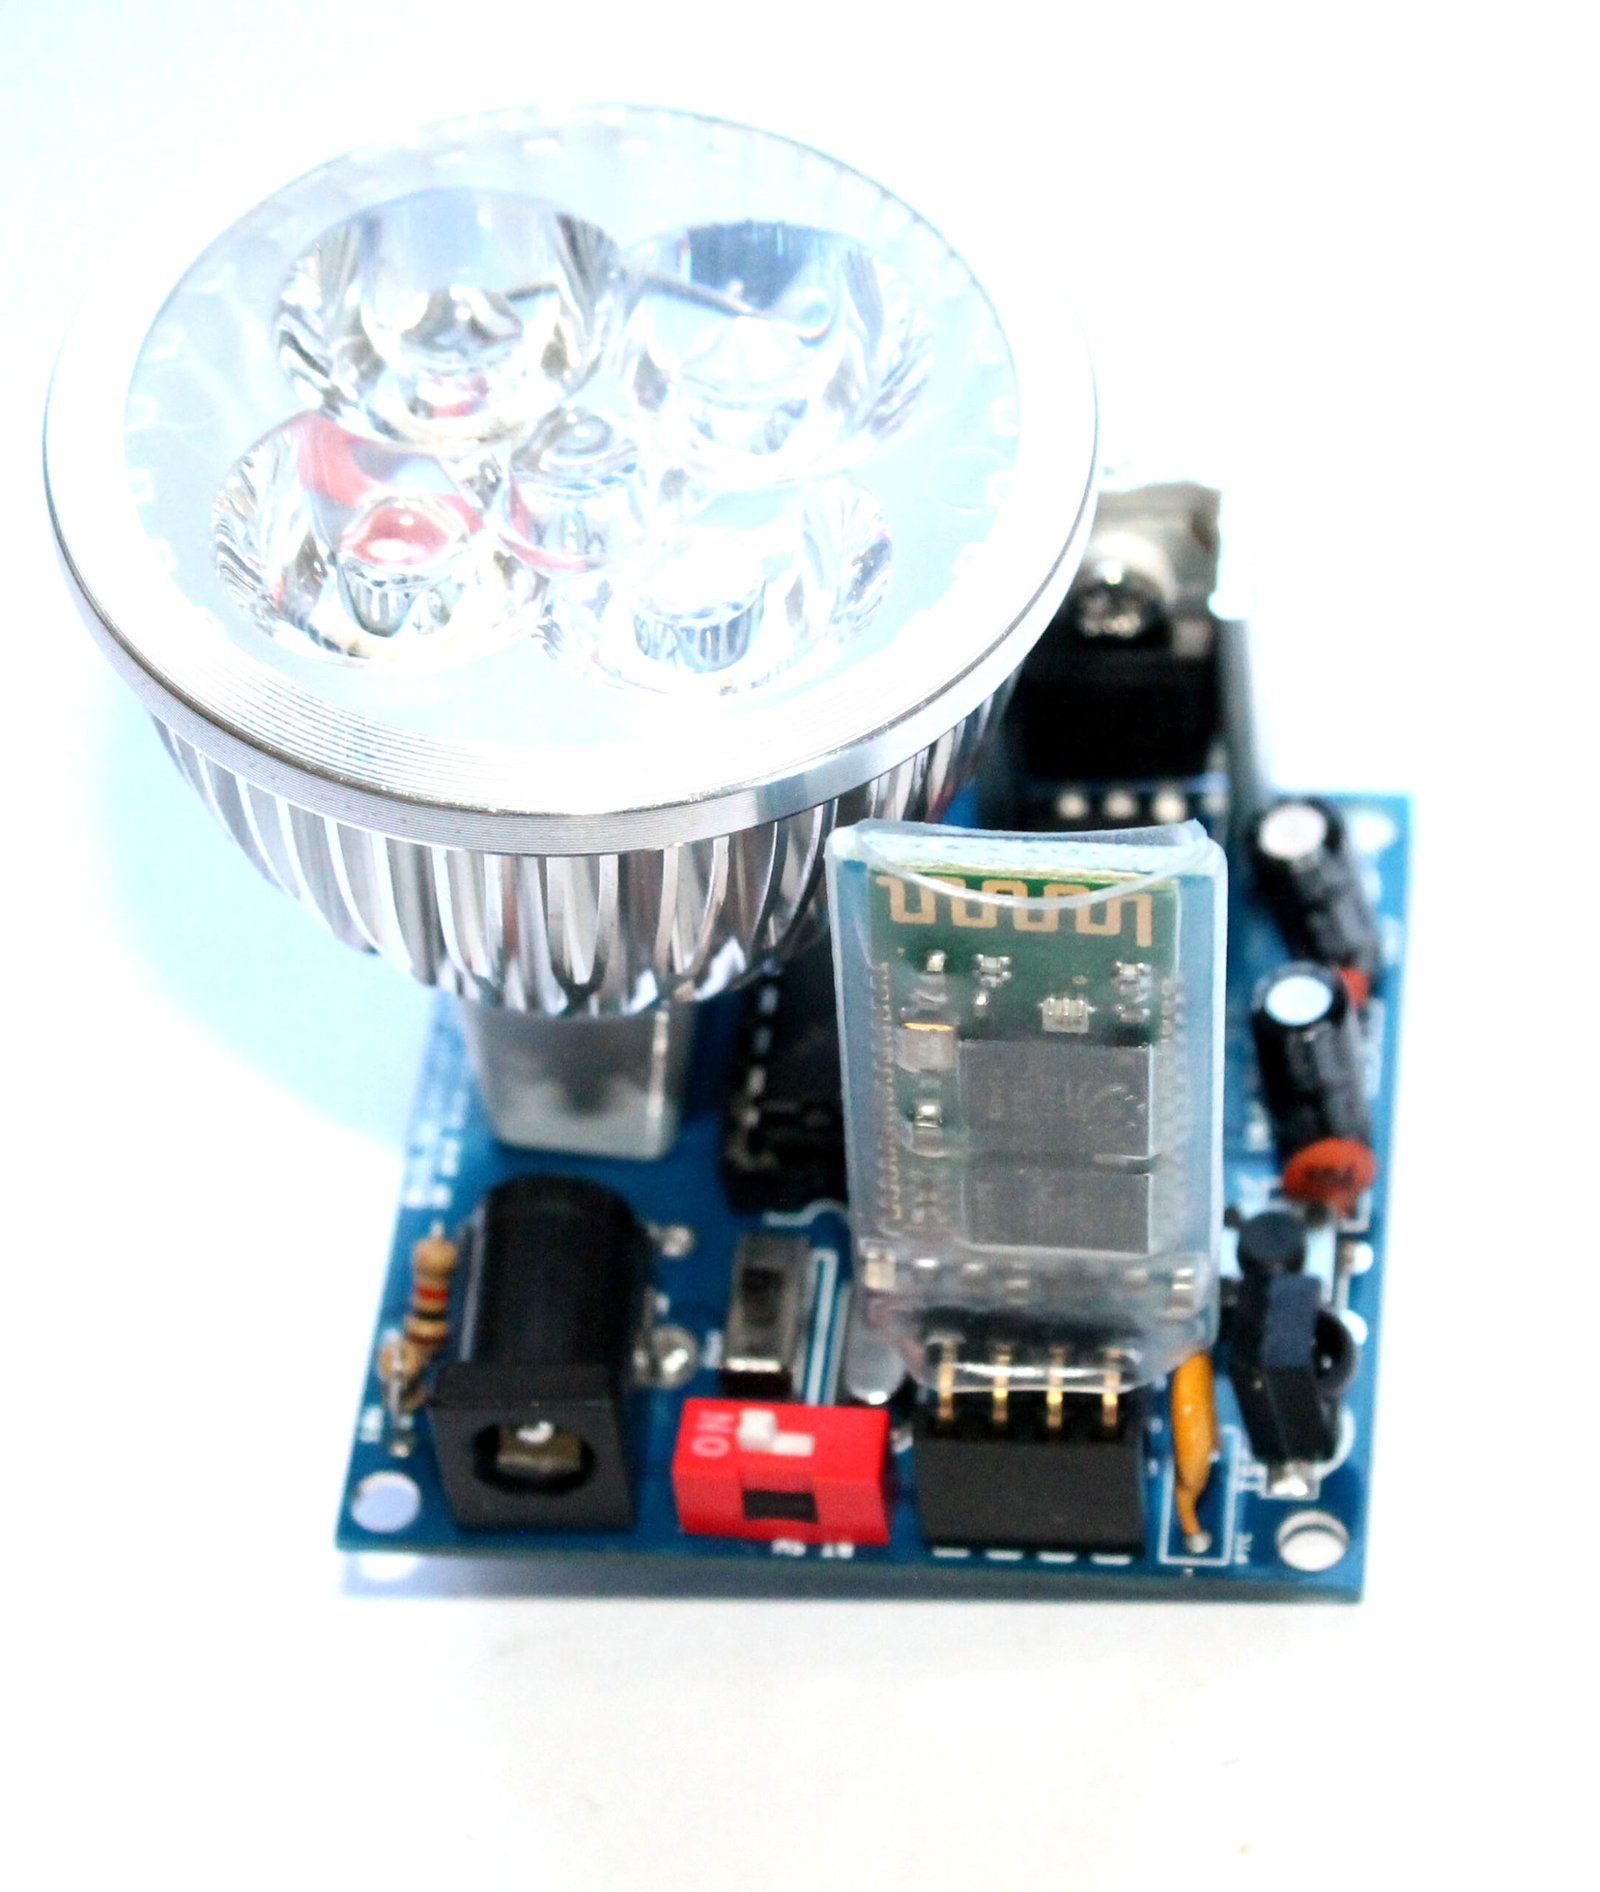
About Amarino Lamp
This post shows you how to assemble the Amarino lamp. The kit package includes the following components. Click on the links of the components the components below to see how the components have been assembled on the circuit board.
You will need basic soldering knowledge to assemble the kit. The assembly process is very straight forward, you can easily guess which components to solder where on the PCB. The silkscreen labels are very clear and directs you to assemble the board properly.
- 1 x Bare PCB with silkscreen indicators. (click on the links to see the assembly images)
- 2 x 22pF ceramic capacitors (step 1)
- 1 x 0.1uF ceramic capacitor (step 2)
- 1 x 16Mhz crystal oscillator (step 3)
- 1 x 1N4001 diode (step 4)
- 1 x 3mm LED (step 5)
- 1 each x 10K and 1K resistors (step 6)
- 1 x TSOP4838 infrared sensor (step 7)
- 1 x tactile reset switch (step 7)
- 1 x 500mA PTC resettable fuse (step 8)
- 1 x 1P DIP switch and 1 x SPDT switch (step 9)
- 1 x 4 pin female header (step 10)
- 1 x 28 pin DIL socket (step 11)
- 1 x 16 pin DIL socket (step 12)
- 1 x 6 pin male header for FTDI basic breakout board (step 13)
- 2 x 10uF electrolytic capacitor (step 14)
- 1 x DC barrel (step 15)
- 1 x LM7805 with heat sink (step 16)
- 1 x LED lamp (step 17)
- 1 x Bluetooth module (step 18) (you need to stack this Bluetooth module while using the kit)
- 1 x ULN2003 and 1 x Atmega328P with Arduino Bootloader (Insert these chips in the respective DIL sockets)
Documents:
Where can you buy ?


 Dive into our collection of DIY Kits,
  Audio Amplifiers, Digital Scoreboards, FM transmitters, and more!
 Explore endless possibilities at our new store.


