Arduino Project 4- LDR and Buzzer Experiment
In this project, we will learn to experiment with LDR and a buzzer. The output of this experiment is sound with different frequencies that are produced depending upon the light falling on the LDR/photoresistor.
STEPS
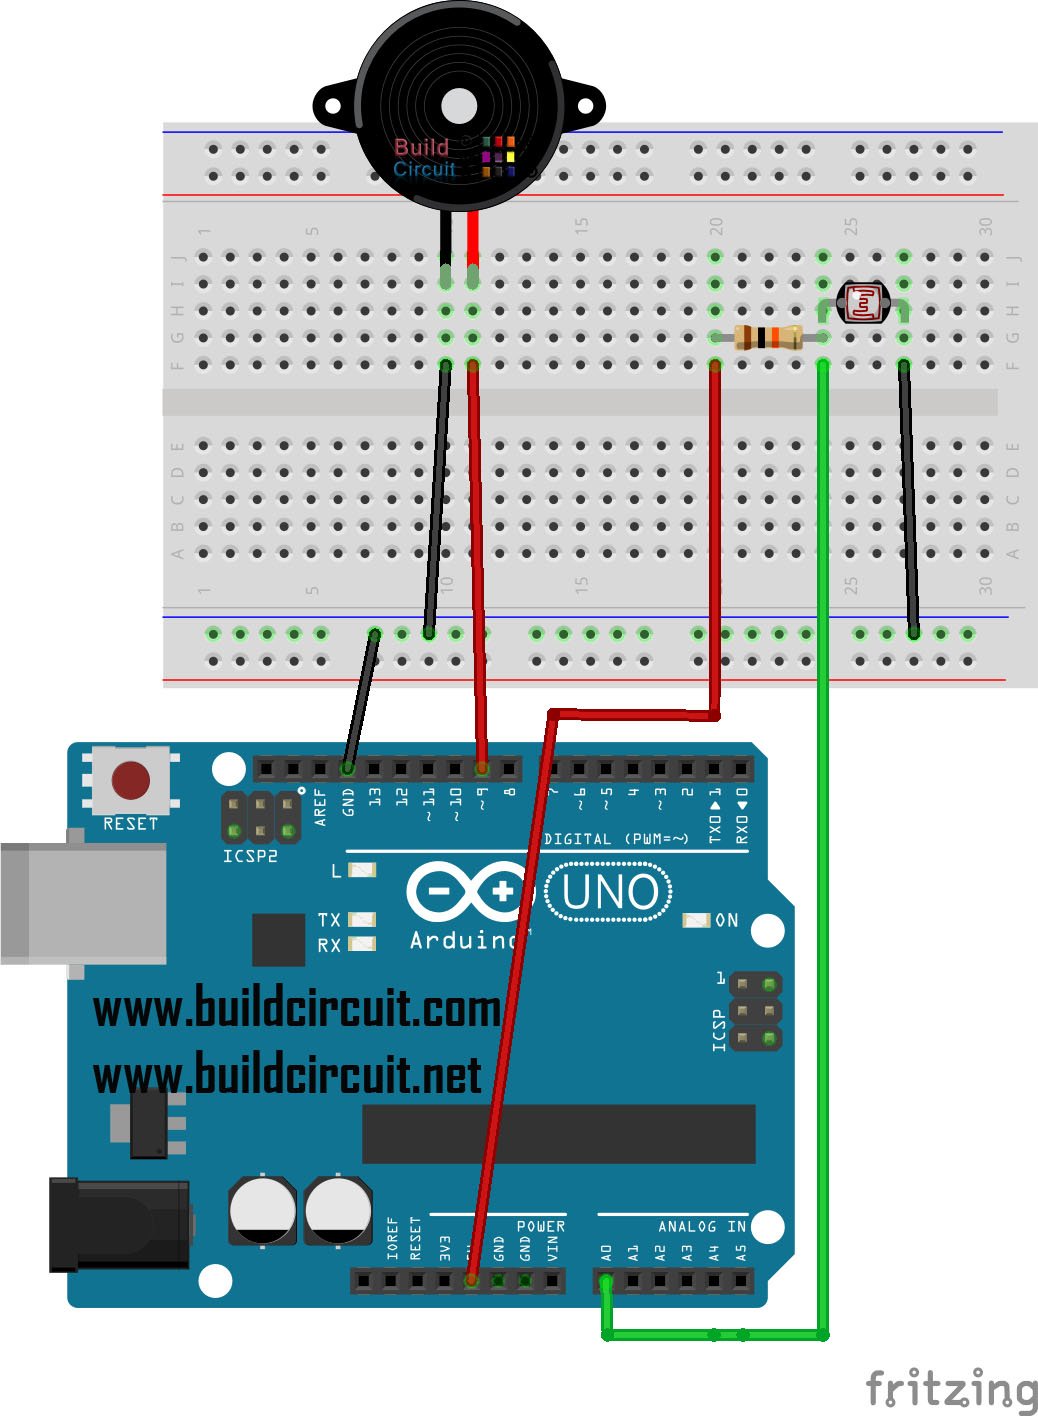
– Connect the negative black wire of the buzzer to pin GROUND and the black positive to the digital pin 9.
– Connect to pin 5V a resistor of 1 kΩ and the other end of it a photoresistor and pin A0.
– Connect the other lead of the resistor pin GROUND.
List of components:
| Name | Quantity | Component |
|---|---|---|
| R1 | 1 | 1 kΩ Resistor |
| PIEZO1 | 1 | Buzzer [Piezo small] |
| R2 | 1 | Photoresistor |
| U1 | 1 | Arduino Uno R3 |
🛠️ Dive into our collection of DIY Kits, 🔊 Audio Amplifiers, Digital Scoreboards, FM transmitters, and more!
🎶 Explore endless possibilities at our new store.