Arduino Project 3- Arduino Potentiometer and LED
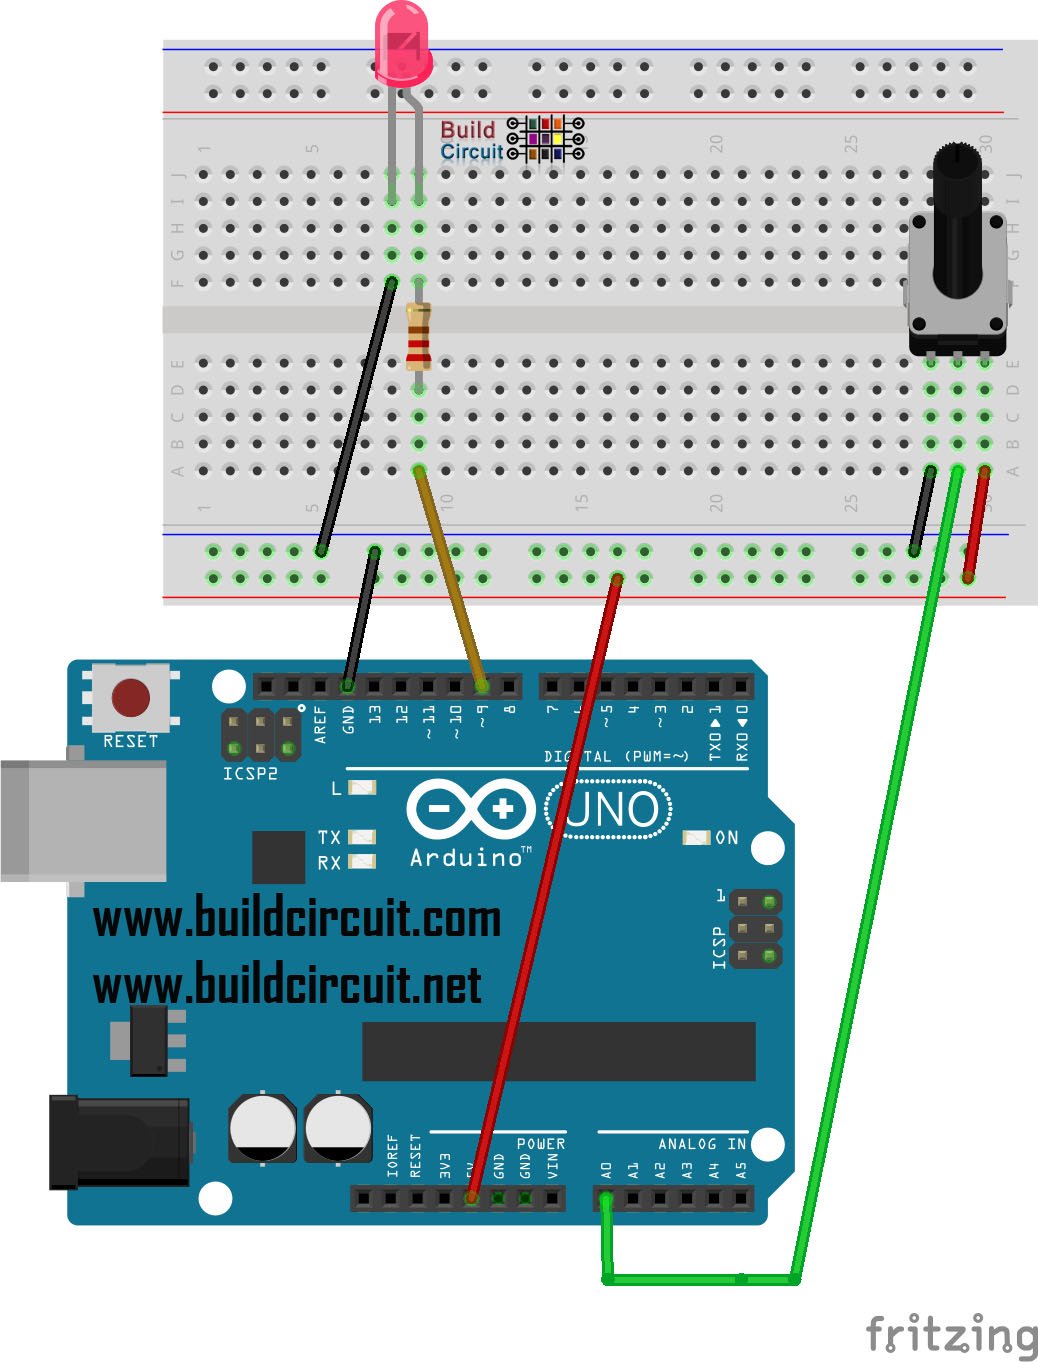
In this tutorial, we will learn to use a potentiometer with Arduino. It allows us to change its value by turning a small knob, the analog value read by Arduino will enable us to do our flashing of the LED depending on the value read.
Steps:
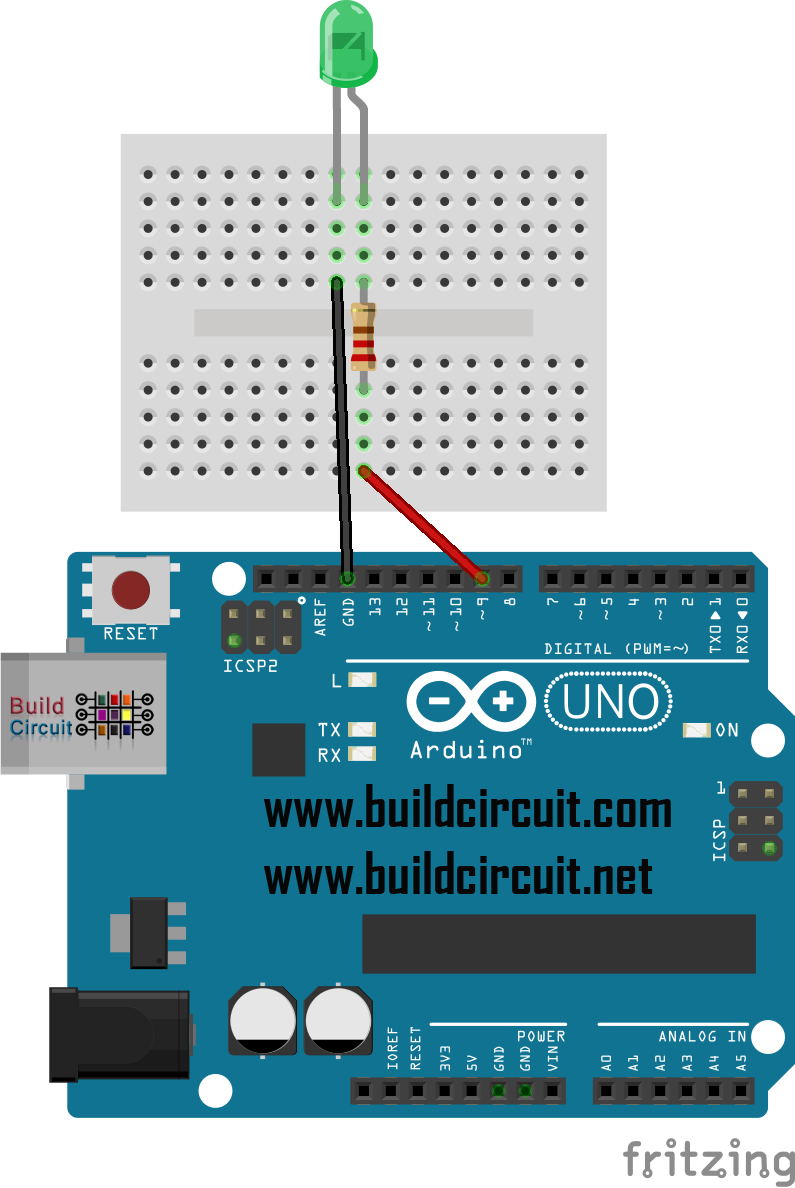
-Connect the LED as shown on the image.
-Connect to pin A0 the middle pin of the potentiometer
-Connect the other two leads- one to the GND and the other to the 5V pin. This does not affect the functioning of the potentiometer.
List of components:
| Name | Quantity | Component |
|---|---|---|
| D1 | 1 | Blue LED |
| R1 | 1 | 220 Ω Resistor |
| Rpot1 | 1 | 10 kΩ, Potentiometer |
| U1 | 1 | Arduino Uno R3 |


