


Experiments with Amarino Nano 1.0
If you have come to this page from a search engine, please read this page first, you will eventually come back to this page again. The first page gives you the idea of Amarino Nano 1.0 and its features.
Steps for experiments:
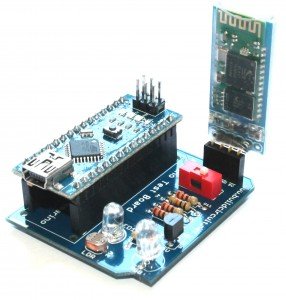
Before you start the experiment, stack the Arduino Nano and Bluetooth modules on the headers of Amarino Nano. This is how you do that:

Then connect it to your computer for programming using the provided USB cable. Please remember that you need to turn off the RED colored 1P-DIP switch while uploading your sketch to your Arduino.
For all the experiments, you have the following things in common:
Step 1: Amarino Toolkit MAIN application: This is the main Amarino application to be installed on your Android phone. There are other applications which work only after installing the main application. If the link does not work, download the application from here.
Step 2: Amarino Library for Arduino: Download it and move it to the Libraries folder. You can check here if the Amarino team has upgraded the library. It’s always good to use the updated version ![]() .
.
If the given link does not work, you can download the library from this link.
After installing the Amarino main application and Amarino library, we move to the following steps:
Step 3: Pair up the Bluetooth adapter module with the Bluetooth of your Android phone. The pairing code is 1234.
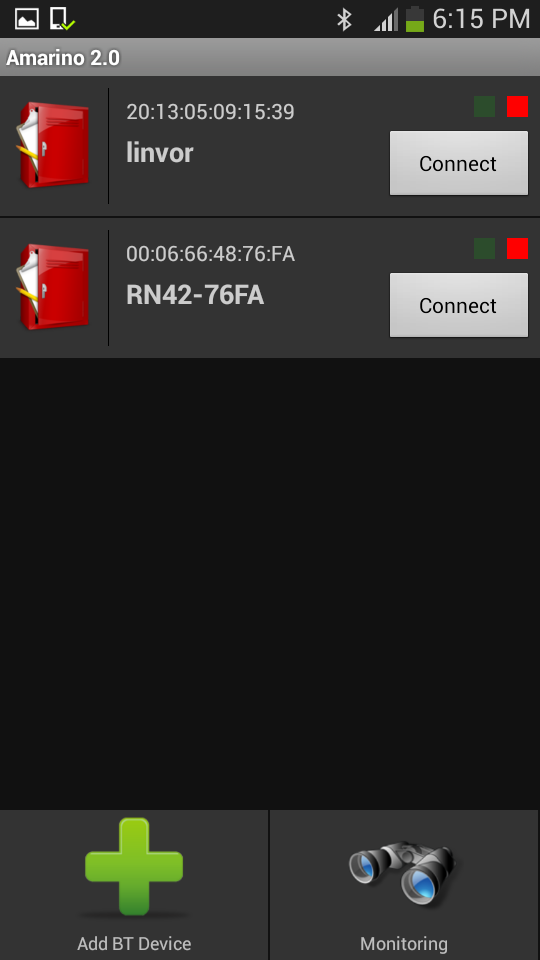
After installing the Bluetooth adapter on the Amarino Nano kit, switch on the Bluetooth function of your phone, open the Amarino application and connect each other using the pairing code 1234. You can see the MAC ID of the Bluetooth adapter on the Amarino application interface. On the image shown below, you can see that there are two Bluetooth adapters with two different names and IDs registered on the application. Pressing the “Connect” button connects the application to the chosen adapter. You can connect only one adapter at one time.
Once the adapter is paired up, you don’t need to pair it again.
A low cost general Bluetooth adapter is enough for this shield. You can purchase one at www.buildcircuit.com.au.
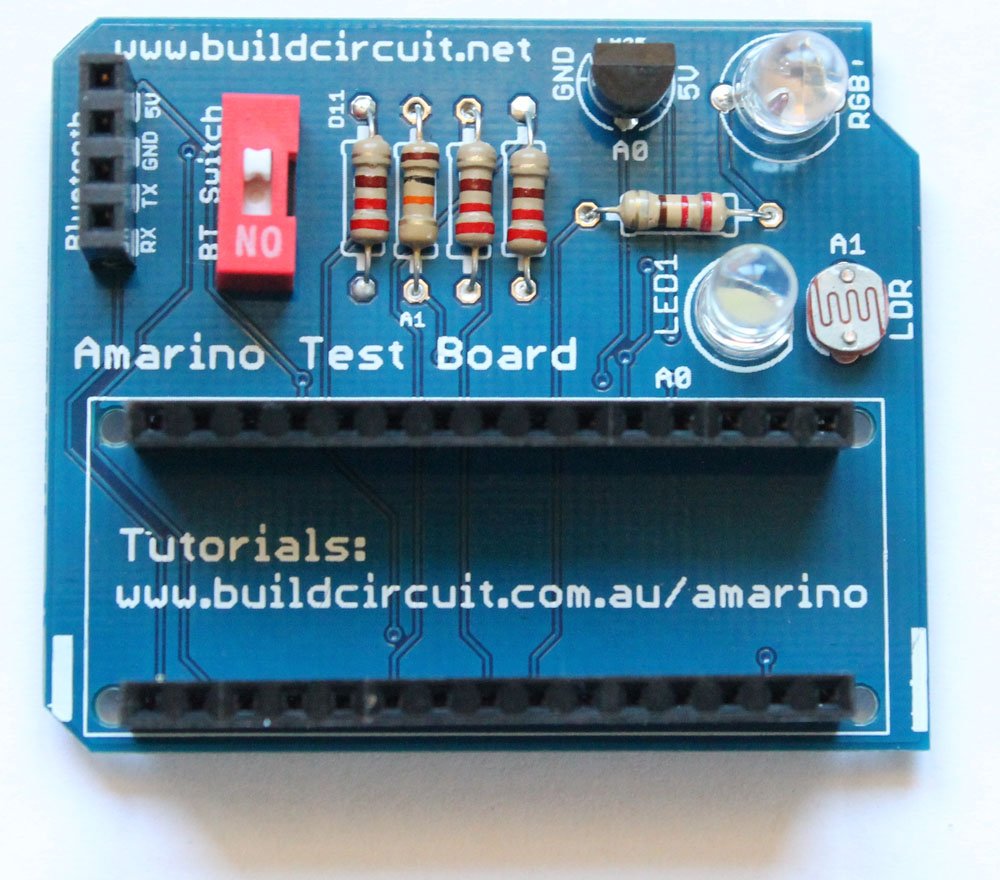
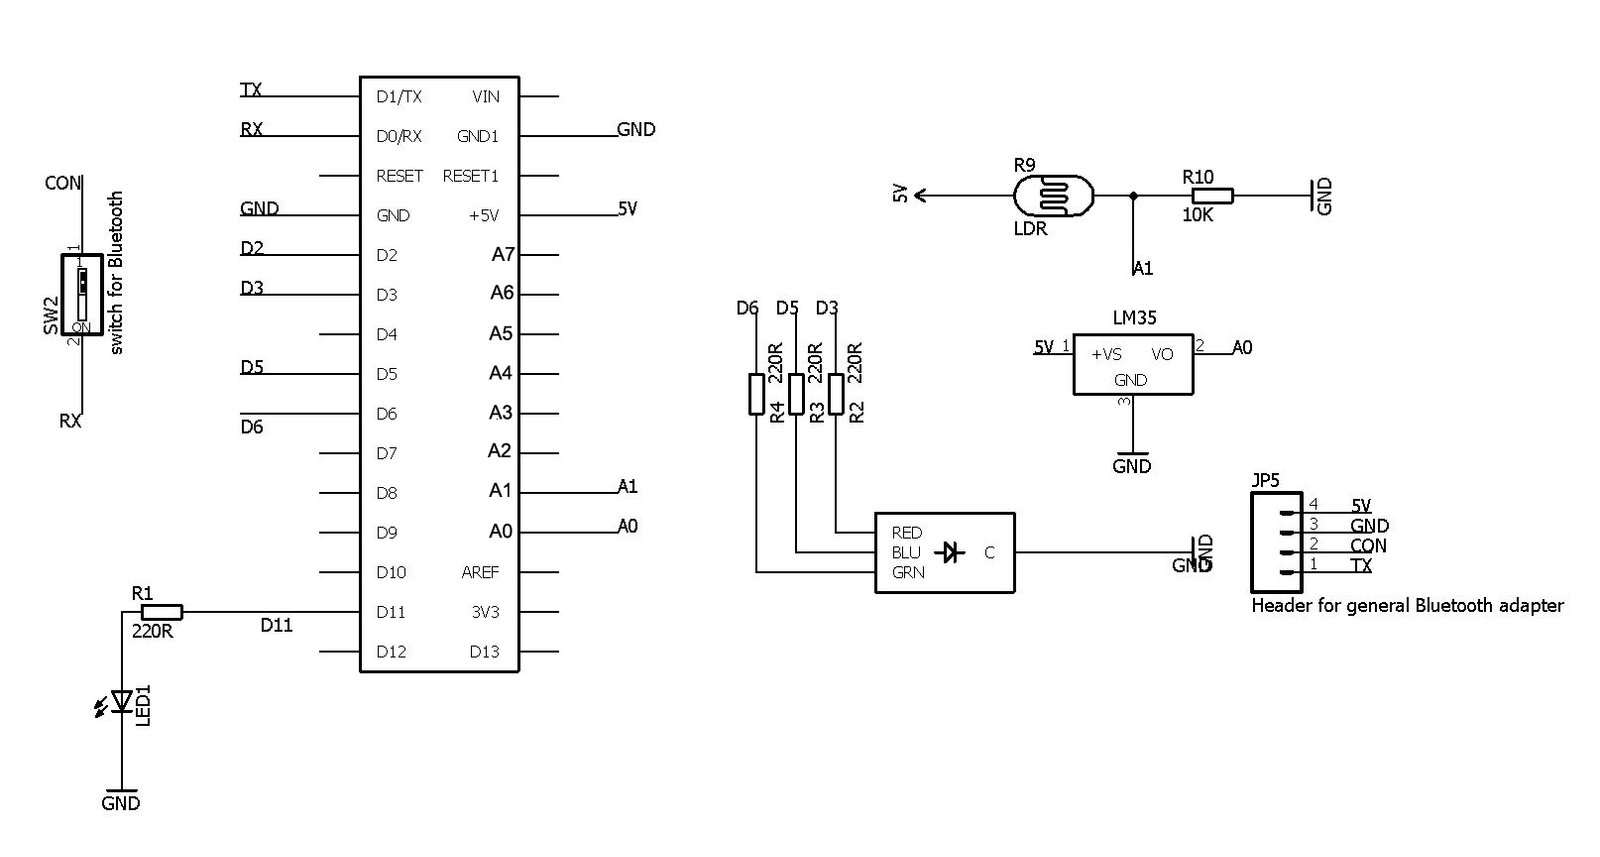
Look at the schematic before you start:
On the schematic given below you can see how the components are connected to Arduino Nano. Seeing the schematic you can expect the output of your projects.
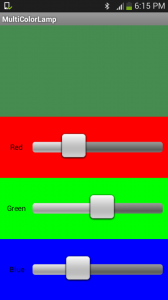
Experiment 1- RGB LED Control: watch this video.
Remember to turn off the RED color 1P DIP switch while uploading your Arduino sketch.
RGB LED is connected to digital pins 3(RED), 5(GREEN) and 6(BLUE).
- Download the RGB LED control application and install it on your phone.
- Download the Arduino source code and upload it to your Arduino Nano. NOTE: You need to switch off the 1P DIP switch while uploading the sketch. After uploading switch it on again.
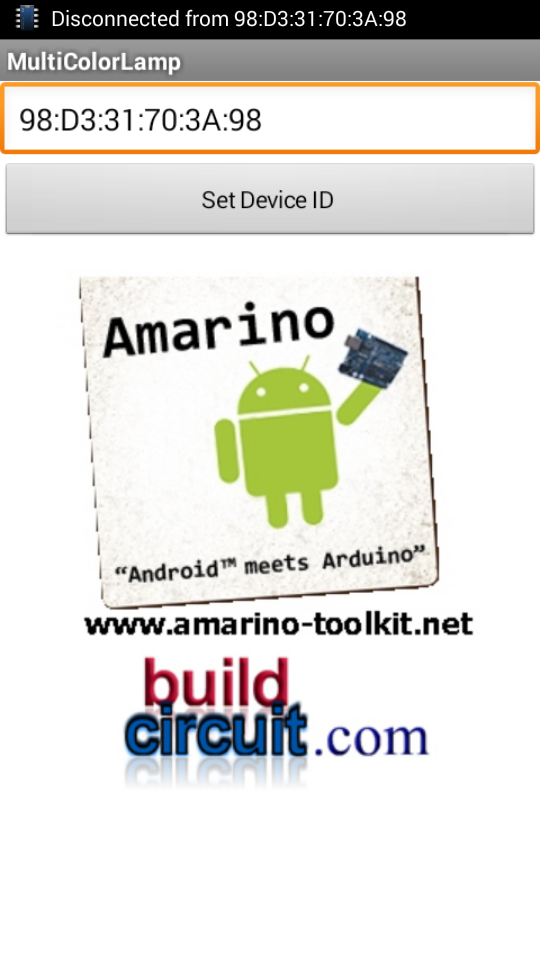
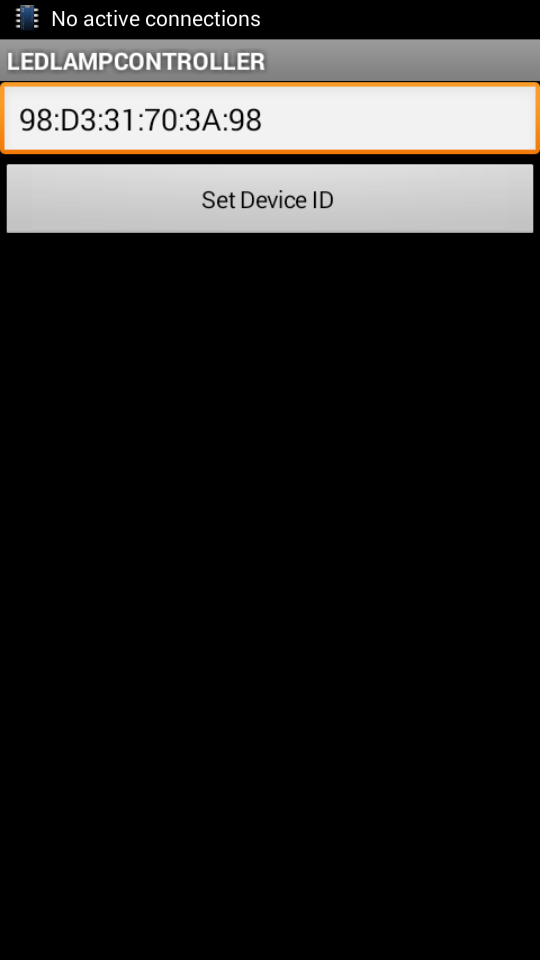
- Set Bluetooth MAC ID. It is different for all Bluetooth modules. My Bluetooth module has MAC ID: 98:D3:31:70:3A:98, so, I used that. You will have a different MAC ID for your Bluetooth module.

- Open the application and control your RGB LED. As you move the slider, the color on the RGB LED changes. Remember to switch on the 1P DIP switch, otherwise, it won’t work.
- Watch the video- If you are still not clear about the process, watch this video.
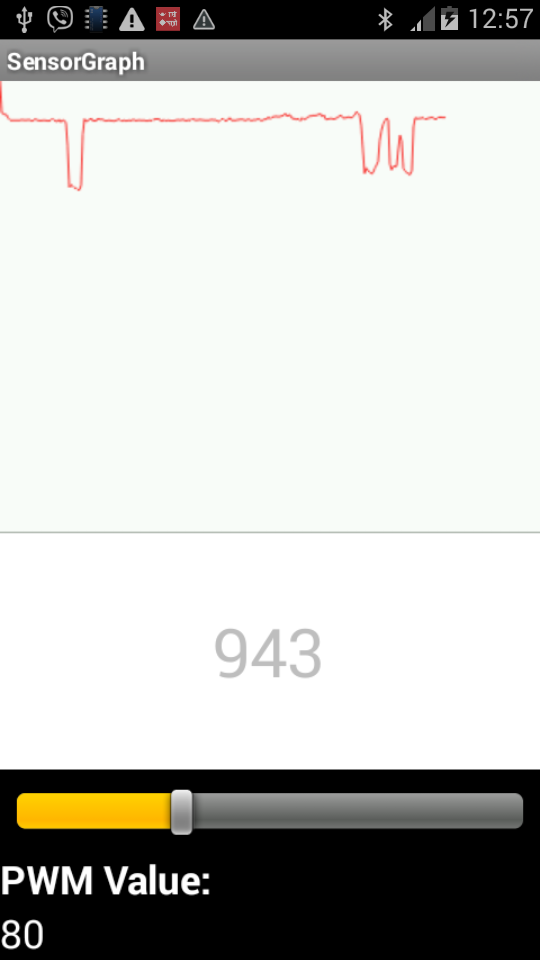
Experiment 2: Sensor Graph display
Switch off the RED color 1P DIP switch while uploading your Arduino sketch.
The photoresistor/LDR is connected to A1 and the 5mm white LED is connected to D11.
- Download the sensor graph application and install it on your phone.
- Download the Arduino source code and upload it to your Arduino Nano. NOTE: You need to switch off the 1P DIP switch while uploading the sketch. After uploading switch it on again.
- Set Bluetooth MAC ID. It is different for all Bluetooth modules. My Bluetooth module has MAC ID: 98:D3:31:70:3A:98, so, I used that. You will have a different MAC ID for your module.


- Open the application and see the sensor data on your phone. You may also control the 5mm LED simultaneously. Remember to switch on the 1P DIP switch, otherwise, it won’t work.
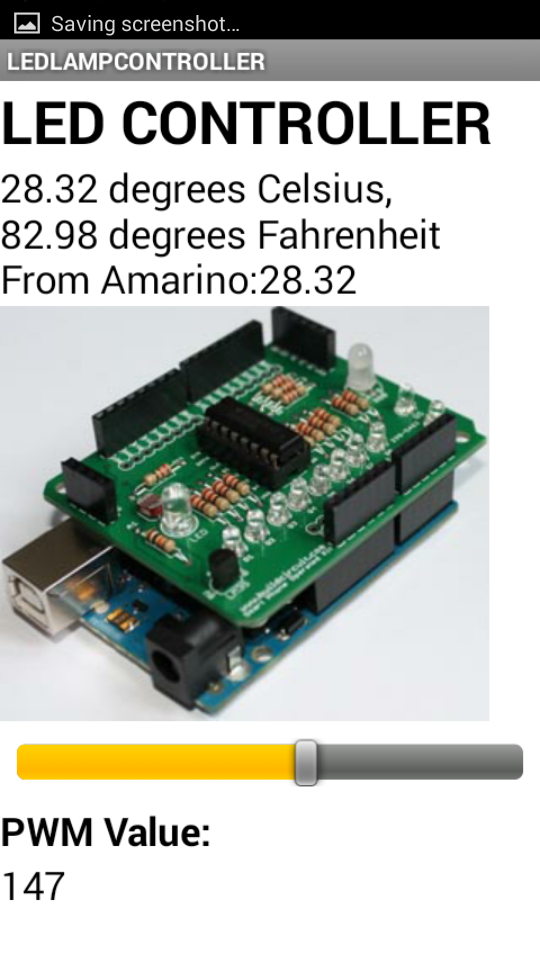
Experiment 3: LM35 temperature sensor data display
Switch off the RED color 1P DIP switch while uploading your Arduino sketch.
LM35 temperature sensor is connected to A0.
- Download the LM35 temperature senor display application and install it on your phone.
- Download the Arduino source code and upload it to your Arduino Nano. NOTE: You need to switch off the 1P DIP switch while uploading the sketch. After uploading switch it on again.
- Set Bluetooth MAC ID. It is different for all Bluetooth modules. My Bluetooth module has MAC ID: 98:D3:31:70:3A:98, so, I used that. You will have a different MAC ID for your module.

- Open the application and see the sensor data on your phone. You may also control the 5mm LED simultaneously. Remember to switch on the 1P DIP switch, otherwise, it won’t work.
Where can you buy this kit ?
The kit is available at BuildCircuit Store (www.buildcircuit.com.au- Free Shipping in Australia)

🛠️ Dive into our collection of DIY Kits, 🔊 Audio Amplifiers, Digital Scoreboards, FM transmitters, and more!
🎶 Explore endless possibilities at our new store.


