


How to assemble Magician Chassis
Check out similar robotics chassis at Buildcircuit store
Sparkfun.com has recently released a simple, easy and useful robot platform for robotics amateurs. It is called “Magician Chassis”. You can use the chassis for different kinds of robots, for example, line sensing, obstacle detecting and smart phone controlled robots. I have recently published an easy project about smart phone controlled robot. I have also used Magician Chassis on my project. I recommend this chassis for robotics amateurs and novices because it is cheaper than other products I have known. You can use it for learning and experimenting the basics of robotics.
You get these components in the Magician Chassis package:


Photos from sparkfun.com
How to assemble Magician Chassis?
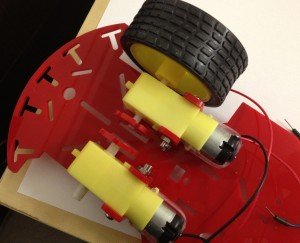
Step 1: You have two chassis boards, CHASSIS-UP and CHASSIS-BOTTOM. Put motor holders on Chassis-Bottom.


Step 2: Connect speed holder with wheel rotator of motor and fix on the chassis-bottom. Fix the motor using M3*30 Screw and M3 nuts.
 fixed with wheel rotator.")


Step 3: Fix another motor also on the chassis-bottom.


Step 4: Now fix the wheels.


Step 5: Assemble Omni wheel using M3*6 screw and L25 spacer.


Step 6: Fix battery holder using M3*10 flathead screw

Step 7: Use L25 spacer to fix chassis-up

Step 8: Fix Chassis-up over the L25 spacers.

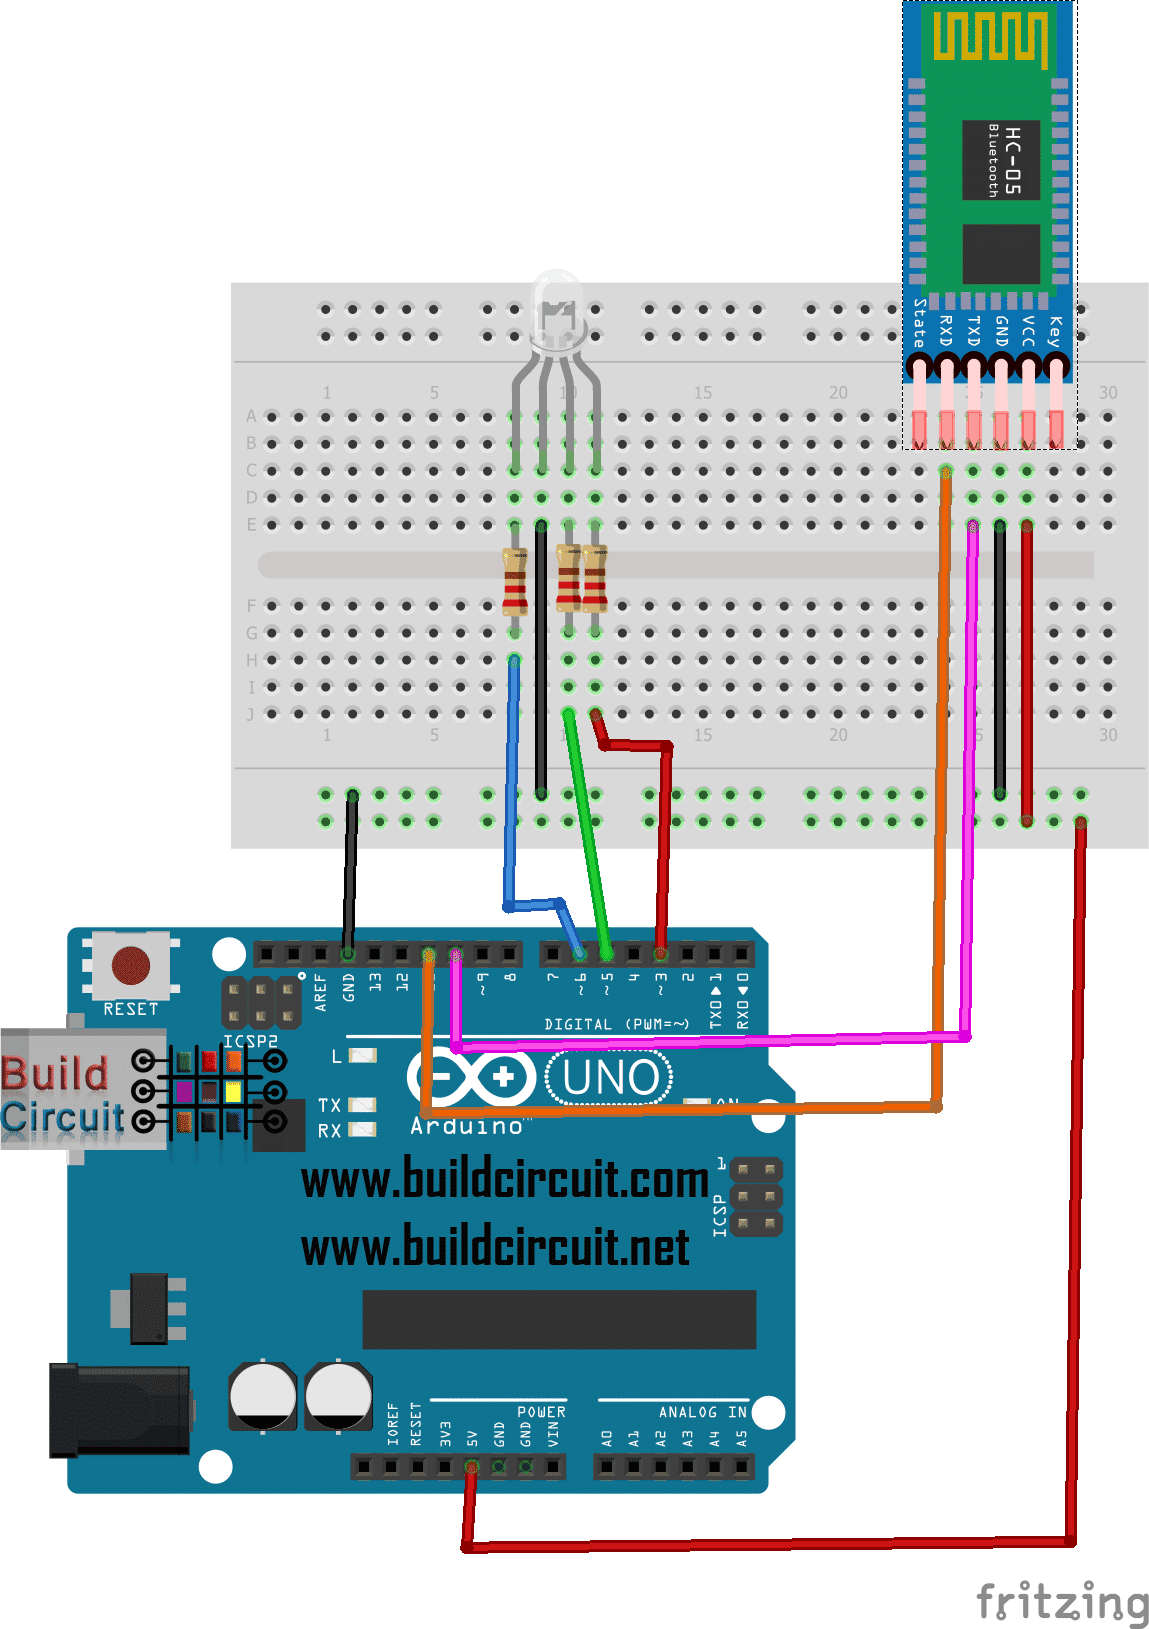
READ POST: A SIMPLE SMART PHONE CONTROLLED ROBOT USING MAGICIAN CHASSIS
🛠️ Dive into our collection of DIY Kits, 🔊 Audio Amplifiers, Digital Scoreboards, FM transmitters, and more!
🎶 Explore endless possibilities at our new store.


Hi, Great Project! I’m looking for build instructions to a similar car that uses a Pi and a DAGU Arduino board. I purchased the parts to build a couple of years ago and now cannot find the build instructions. Thanks in advance for any assistance.