


How to use C51 4 Bits Digital Electronic Clock DIY Kit
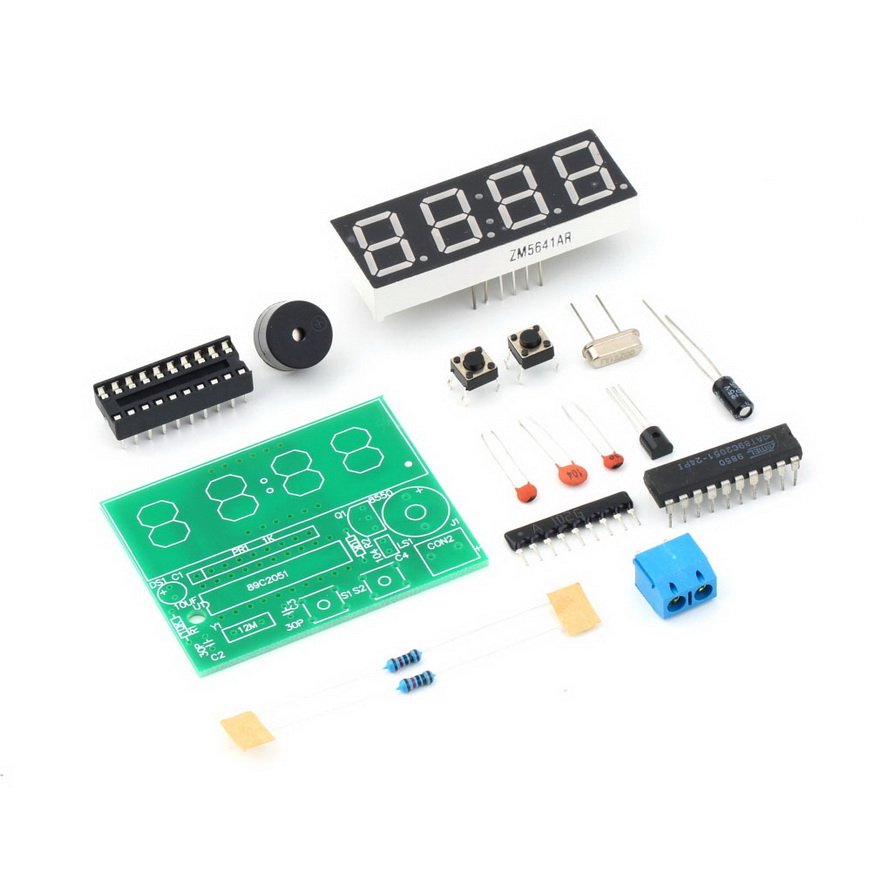
This is a very popular digital click for beginners. It is a DIY Kit. It is now available at BuildCircuit Store. It is based on AT89C2051-24PU.
Basic Functions:
1. Hour and minute display & minute and second display
2. Two alarms set up
There is a buzzer that works as an alarm. When the clock reaches hours…like 1:00, 12:00, etc., it will beep for 3 times. The alarm beep is optional, you can disable it.
The kit can be operated with a 3.3V to 6V battery.
On the kit, you will see two switches S1 and S2 which are used to set up time and alarm.
The time and alarm time are displayed with 4 digit seven segment display.
 This kit is available at www.buildcircuits.com
How to set up time
Time can be set up using switches S1 and S2.
After you turn on the kit, you will see hour and minute displayed on the display. By default, you will see 12:59.
If you press S2, you will see minute and second. You can press S2 again to go back to hour and minute display.
To set time, press S1 until you hear 2 beeps at the same time (beep-beep, very quickly) that should eventually display A on the seven segment display.
A means hour on the display. If you want to set hour, press S2.
For setting minute, press S1 again and that should should display B which means minute setting. Then, press S2 to set minute. After you reach the required minute setting, press S1 again and you are done.
Watch the video below to be more clear:
How to set up alarm
You can set up two alarms in the kit.
While setting up the time, you will see A and B displayed on the display.
You will see C, D, E, F, G, H and I as you keep on pressing switch S1.
However, there are some conditions.
Meaning of the text are given below:
Meaning of C- Make three beeps when the clock displays hours, for example, it will beep three times when the clock reaches 1:00, 02:00, 12:00, etc. Press S2 to turn it ON or OFF.
If you turn it OFF, you won’t hear the beep.
Meaning of D- You will see D when you press S1. It is the first alarm- Press S2 to turn it ON or OFF
If you have turned ON D, then, you will see E and F.
E means hour setting for the first alarm and F means minute setting for the first alarm.
G- Second Alarm- Press S2 to turn it ON or OFF.
Likewise, if you have turned ON G, you will see H and I. H means hour setting for the second alarm and I means minute setting for the second alarm. Press S2 to increase hour and minute in both alarms.
Watch the video below to be more clear:
This kit is available at www.buildcircuits.com


🛠️ Dive into our collection of DIY Kits, 🔊 Audio Amplifiers, Digital Scoreboards, FM transmitters, and more!
🎶 Explore endless possibilities at our new store.


I have built one of these. How do you set it to 12 hour format?