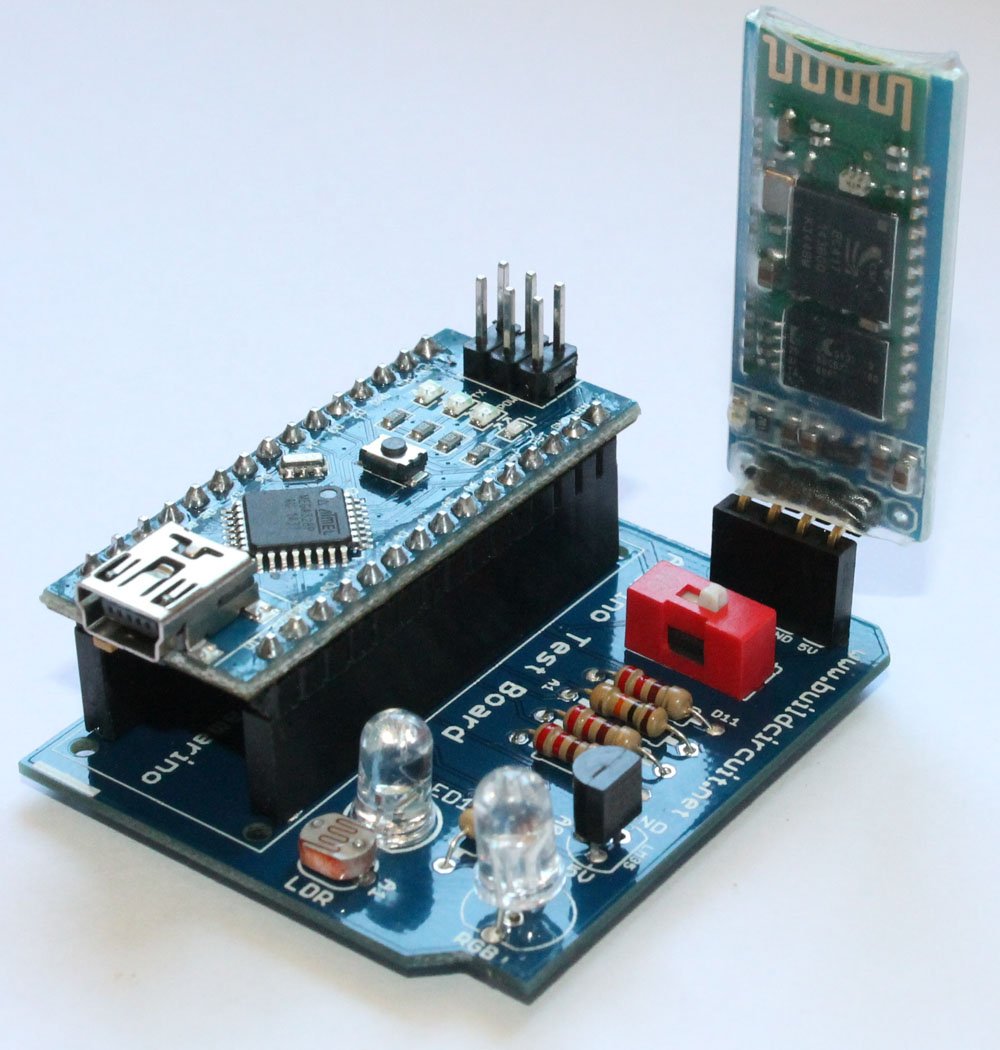
Experiments with Amarino Evaluation Shield

Before you read this post, please read the following posts:
a. Introduction to Amarino evaluation shield.
b. Amarino evaluation shield assembly tutorial.
You can do several experiments with Amarino evaluation shield, for example, control RGB LED, visualize sensor graph on Android phone, display SMS on LCD, etc. Before we start the experiments, let’s check the circuit layout of the shield. The layout has been made using Fritzing (www.fritzing.org).
Schematic:
Download circuit layout- Fritzing format

Basic rules for Android- Arduino experiments [FOR BEGINNERS]
Baud Rate: The baud rate of your Bluetooth Adapter should match with the baud rate of your Arduino sketch. If you are using the general Bluetooth adapter, the default baud rate is 9600 bps and if you are using BlueSMiRF adapter, you need to check it because it can be 57600 or 9600 or something else. I have written a tutorial on how to check and change the baud rate of BlueSMiRF module, check out the tutorial. The tutorial applies to BlueSMiRF module(from Sparkfun) only. I don’t know if that tutorial works for the general adapter.
Point 1: Baud rate of Bluetooth adapter= Baud rate on your Arduino Sketch.
Pairing of Bluetooth adapter and your Android phone: The following video shows you the general procedure for pairing up general Bluetooth adapter and Android Phone. It should also work for BlueSMiRF module. The pairing code for general Bluetooth adapter is 1234.
Point 2: Pairing and code: 1234
Basic experiment with Arduino and Android: I strongly recommend you to do this experiment if you have never tried Android-Arduino communication experiments. This experiment will help you to check if your Arduino is sending message to your phone and vice versa or if your Bluetooth adapter is working properly.
Point 3: Arduino, Android Phone and Bluetooth adapter are in working condition.
Experiments with VT-100 terminal serial emulators:
Download any kind of VT-100 terminal emulator on your Android phone. I recommend these three:
1. Blue Term
3. S2 Bluetooth terminal for 1.6
I have tested these three applications and they are perfect for the shield. I think other applications should also work.
Experiment 1: Send texts from Android to Arduino.
Install S2 Bluetooth Terminal 3 application and send texts from your phone to Arduino and display it on the LCD.
Source code Download source code
Experiment 2: LED control- ON and OFF.
Install one of the stated Android serial emulators and upload the Arduino sketch. Then, after making the Bluetooth connection, simply press A , the LED connected to D11 will switch on. Remember that ‘a’ will not work, it should be capital ‘A’. When you press some other character, you can see on your phone which character you pressed and the ASCII value of that character.
Experiment 3: LED control with Pulse width modulation (PWM).
You can control the LED connected to D11 with PWM signal. The PWM is divided into 255 steps. While giving commands to Arduino, each number between 0-255 is followed by ‘?’. When you press 1?, LED will glow less and for 255? the LED will glow more.
Amarino Experiments
Amarino page: http://www.amarino-toolkit.net/
Before you start experiments with Amarino, please go to Amarino page , read the basics of Amarino, go to Download page and follow the instructions given.
The basic rules stated above applies to Amarino experiments also. I would like to remind again in short.
a. Baud rate of Bluetooth adapter= Arduino baud rate. 9600 works for general Bluetooth adapter and 57600 works for BlueSMiRF.
b. Pair up the adapter and phone. Code= 1234
c. Bluetooth adapter, phone, Arduino and the shield in working condition.
Besides, the Flag written on Arduino Sketch should match with the Flag written on Android code.
Amarino Experiment 1: RGB Multicolor lamp

Arduino Sketch
Watch the video
Amarino Experiment 2: Sensor Graph on Android
")
Amarino Experiment 3: Temperature sensor using LM35 and LED controller
")
Amarino Experiment 4: Light sensor
You can try the light sensor experiment on Amarino evaluation shield using the following tutorial: Light sensor using Amarino
Experiments with Amarino Plugins

Amarino Experiment 5: Test Amarino

Amarino Experiment 6: Light sensor with Amarino Plugin

Amarino Experiment 7: Orientation sensor

Amarino Experiment 8: Experiment with HC-SR04 ultrasonic range finder
You can simply stack the HC- SR04 ultrasonic range finder over the shield and upload the given sketch. It simply displays the distance between an obstacle and the range finder module. You can also display the distance on your mobile phone, for that, simply follow the sketch of LM35 temperature sensor(given above) and modify the codes for range finder.
")
Amarino Experiment 9: Display SMS on LCD
Get full description of this experiment

If you find errors on this tutorial or source codes, please drop some comments. Thank you.
![]()
🛠️ Dive into our collection of DIY Kits, 🔊 Audio Amplifiers, Digital Scoreboards, FM transmitters, and more!
🎶 Explore endless possibilities at our new store.