


How to connect the relay module to the popular clap switch
This article strictly focuses on how to connect the relay-module to the popular clap-switch. If you have come to this page from a search engine, we recommend you to visit the following pages:
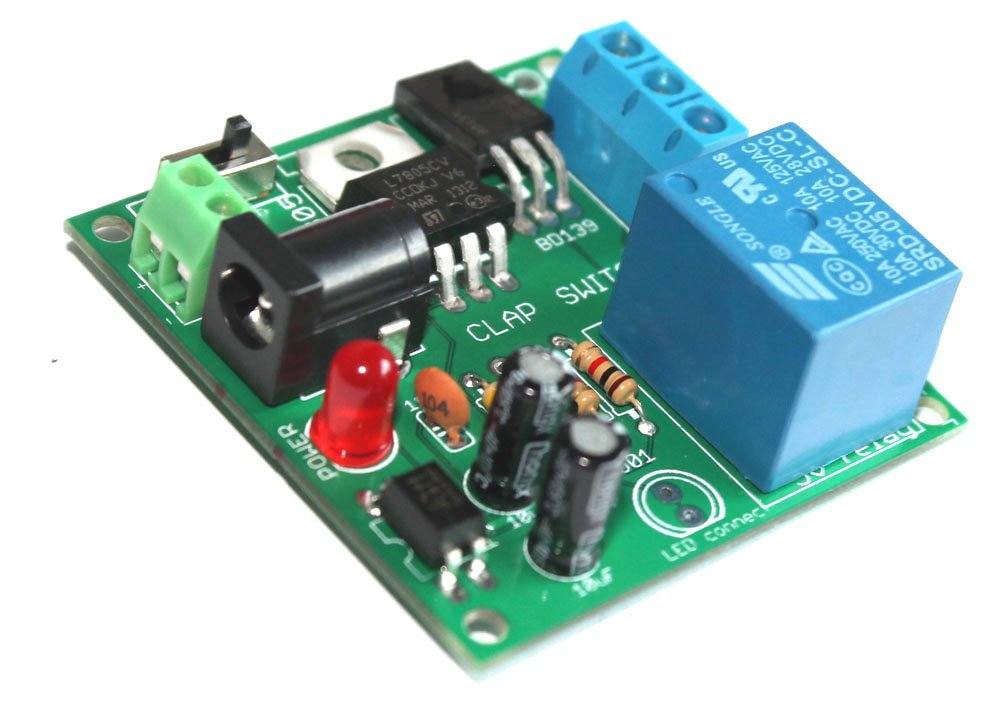
1. About Relay module for the popular clap_switch (Get description of this kit)
2. How to connect clap-switch to the relay module
3. How to use the relay-module and the clap-switch to operate electrical appliances
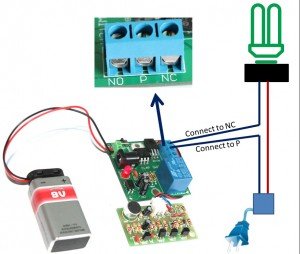
Please follow the shown steps:
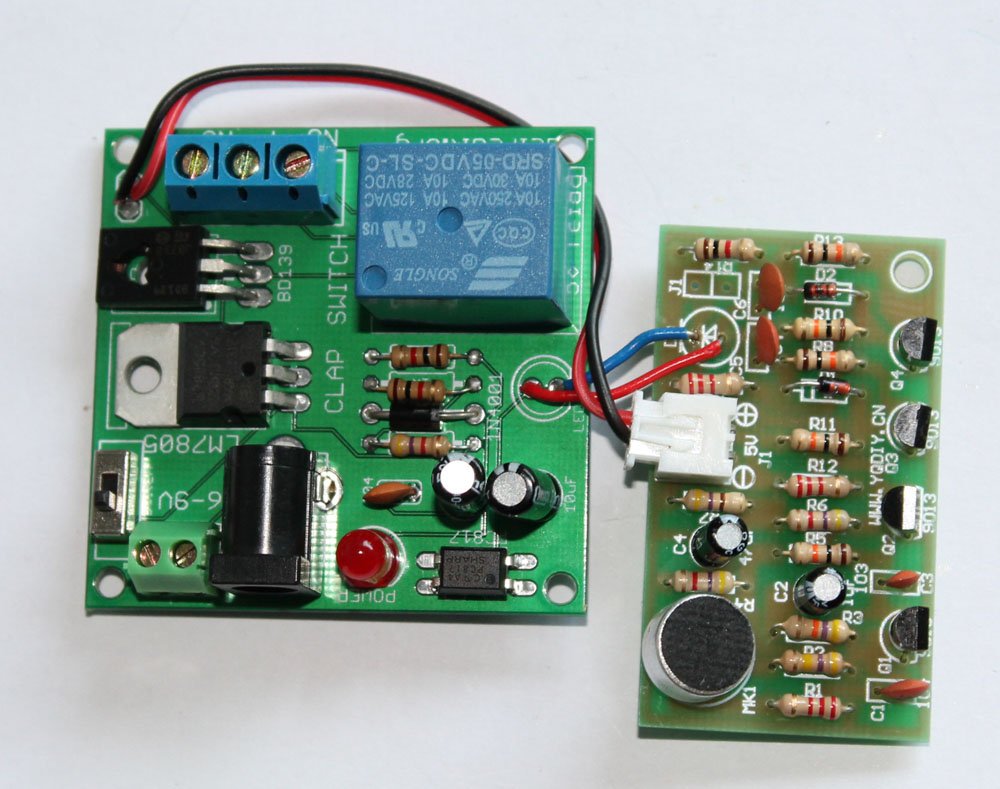
Step 1: Connect the cathode point of clap-switch to the cathode of relay-module.
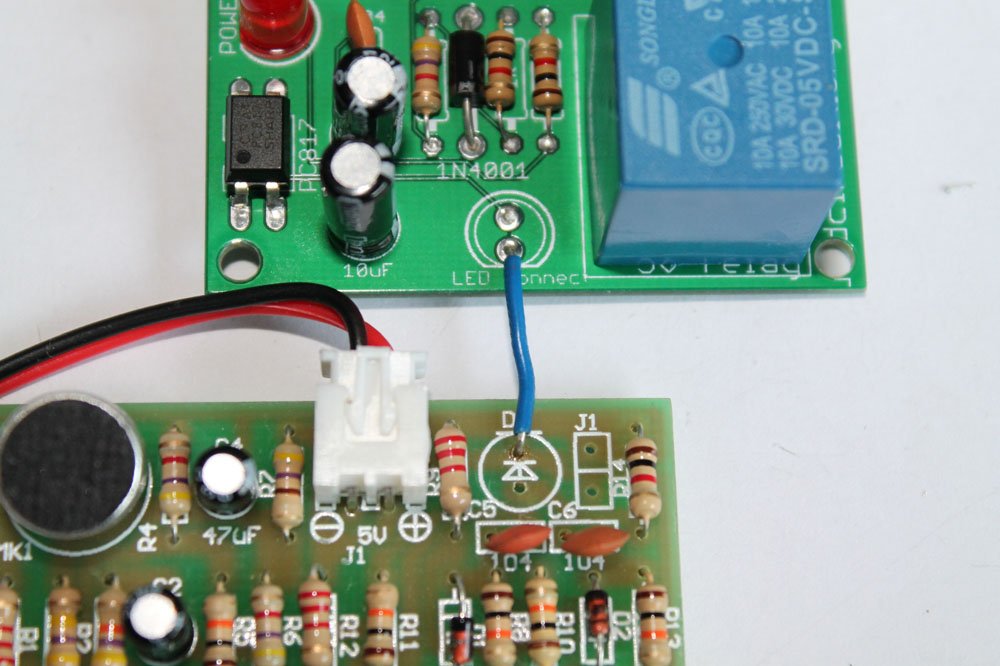
Step 2: Connect the anode point to anode point.
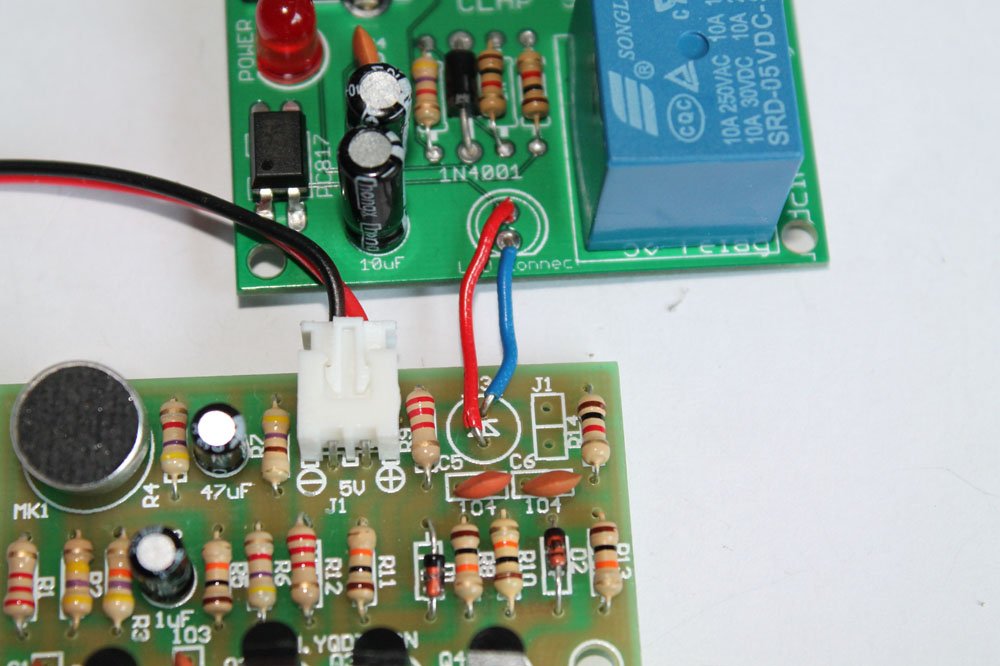
Step 3: Connect the JST connector of clap-switch module to the relay-module. The clap-switch module gets power from the relay-module.
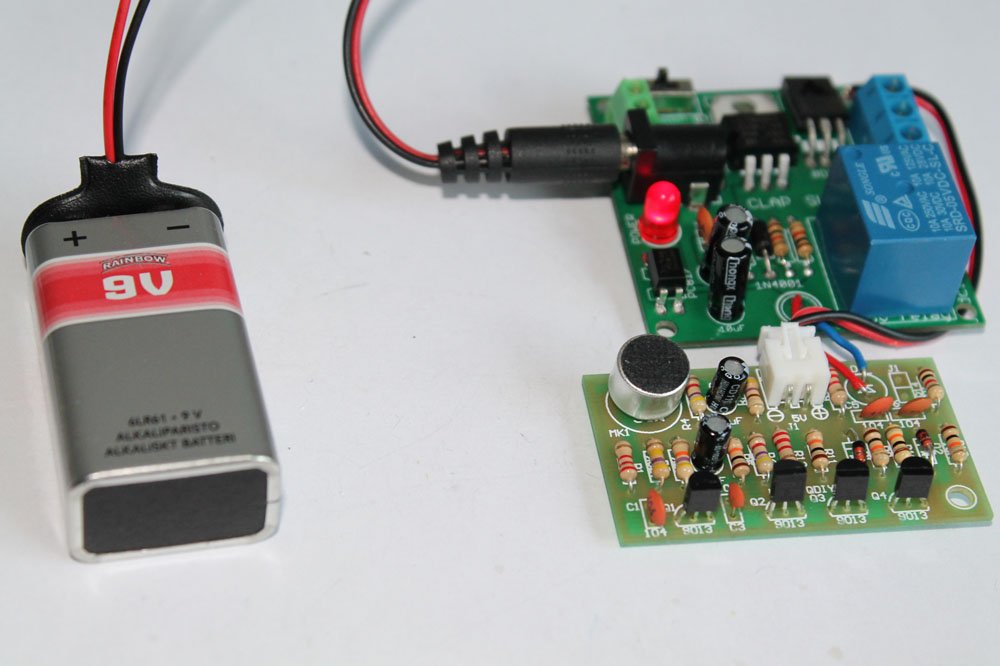
Step 4: Connect a 9V battery to power up the kits. The clap-switch module gets power from the relay-module.
Step 5: This is how you connect the lamp to the combination of kits.

This kit is available at our online store.
![]()
Video:
Recommended documents:

🛠️ Dive into our collection of DIY Kits, 🔊 Audio Amplifiers, Digital Scoreboards, FM transmitters, and more!
🎶 Explore endless possibilities at our new store.


