How to connect a lamp to DIY relay module for the popular clap switch
If you have come to this page from a search engine, we recommend you to visit the following pages:
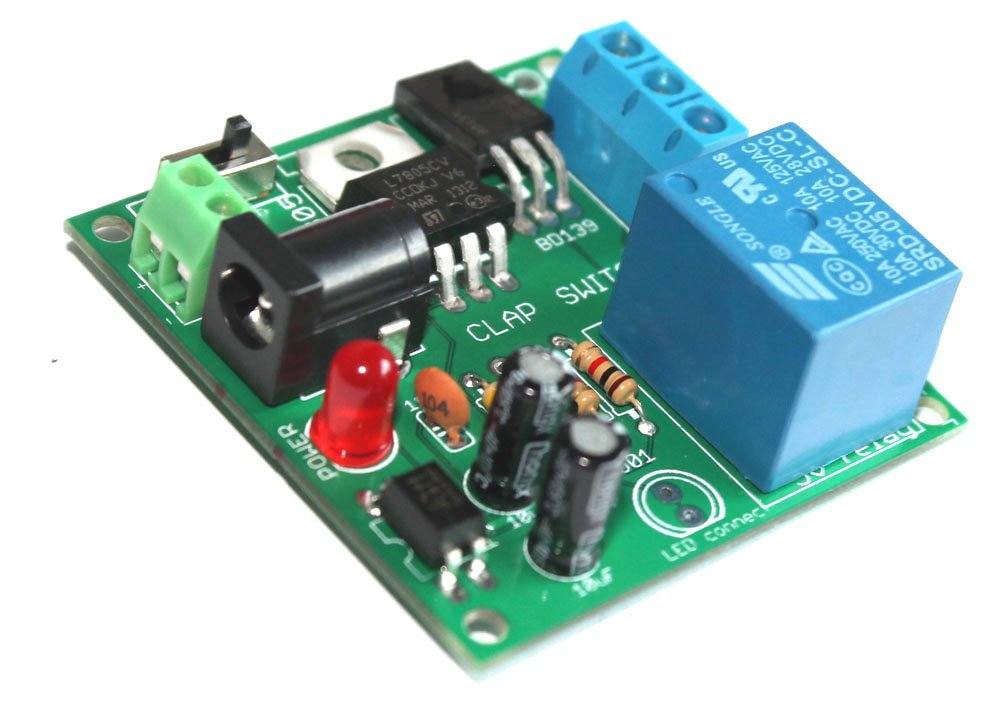
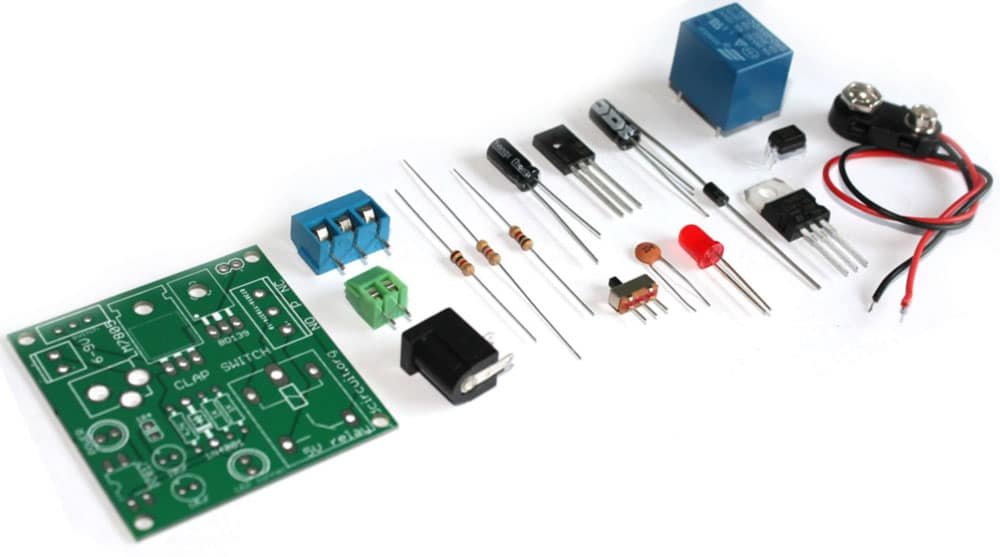
1. About Relay module for the popular clap_switch (Get description of this kit)
2. How to connect clap-switch to the relay module
3. How to use the relay-module and the clap-switch to operate electrical appliances
In this article, we are going to describe how you can use the “clap_switch module+relay_module” to light up 100-240V appliances. When we say 100-240V appliance used with a clap switch, it is usually a bulb/lamp/CFL(Compact Fluorescent Lamp) tube. This article is for absolute beginners, so, we will try to explain all the small details.
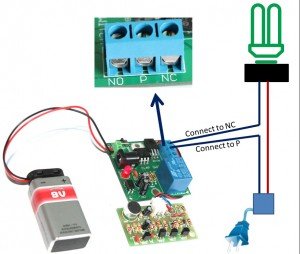
The following image shows the basic set up for lighting a bulb.
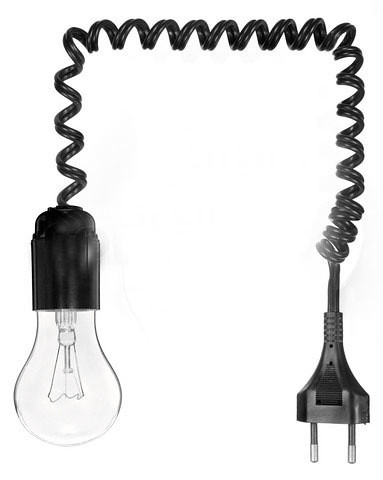
As you can see, there are two wires that go inside the bulb holder and to the mains two pin plug.
To operate such a lamp, we simply break one of the wires and connect the broken ends to the relay. One end goes to NC or NO point and the other goes to the common point or pole (P). Check this article to know about connecting an appliance to a relay.
Detail explanation:
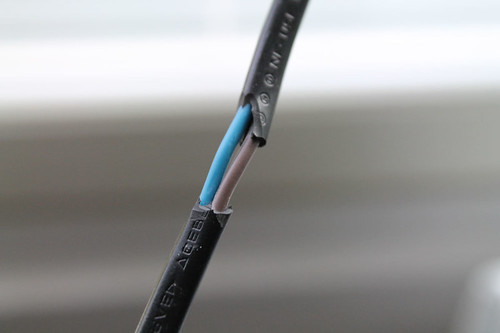
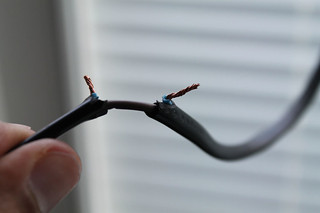
Now, let’s see the above illustration in detail. In the last section of this article, I have shown a video where I have controlled a 220V fluorescent tube. The tube is connected to the mains using two wires that have been shown below. I have removed the outer insulation using a wire stripper.

DO NOT CONNECT THE WIRE TO THE 220v/100v MAINS UNTIL YOU FINISH ALL THE STEPS.
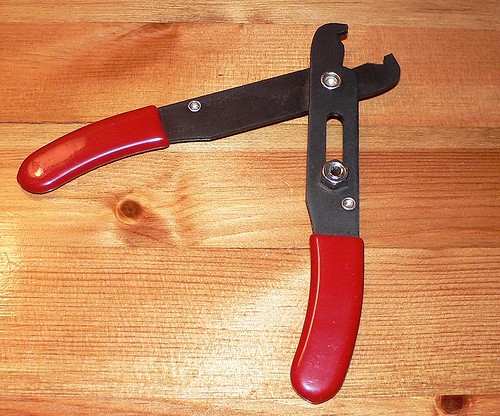
Step 1- Use a wire stripper to cut the outer insulation.
Step 2- Break one of the wires. REMEMBER: DO NOT CONNECT THE WIRE TO THE MAINS WHILE YOU ARE CUTTING THE WIRE.
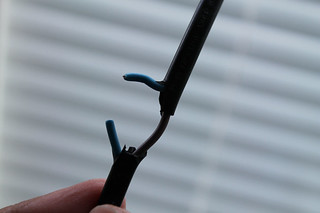
Step 3- Peel off the insulator from the broken wire
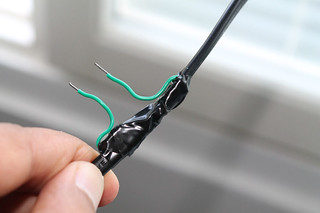
Step 4- Connect two pieces of small wires (solder the wires properly)

Step 5- Cover the soldered(connected wires) using an adhesive insulation tape
Step 6- Loosen the screw terminal

Step 7-Insert the wires into the terminal

Step 7.2- Tighten the screw so that the wire does not come out easily
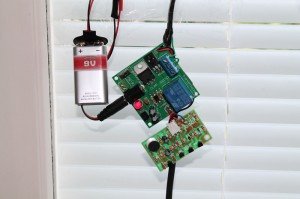
Step 8- Cover the relay and screw terminal pins so that accidental touch on the terminals does not harm you

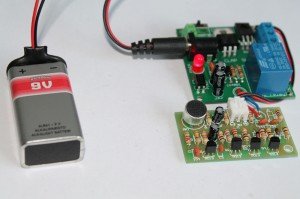
Step 9- Connect a 6V 0r 9V battery to the clap switch and your device is ready. Switch the power supply on using the SPDT switch on the circuit board. Fix it on a wall or inside an enclosure and operate your lamp with your clap.
NOTE: KEEP THE KIT AWAY FROM KIDS. DO NOT TOUCH THE 3 PIN SCREW TERMINAL WITH POWER ON, YOU MIGHT GET ELECTRIC SHOCK. KEEP THE KIT INSIDE AN ENCLOSURE OR COVER THE OPEN PARTS WITH INSULATION TAPES.
This kit is available at our online store.

Video:
The video shows how you can operate a 220V appliance with the clap switch kit.
Recommended documents:
- Other clap switch related articles on BuildCircuit
- How to use a relay
- Buy the kit
- Flickr Images
- About relay_module for clap-switch
- Assembly tutorial
- Connecting clap-switch to the relay-module
- How to connect a lamp to the relay-module
🛠️ Dive into our collection of DIY Kits, 🔊 Audio Amplifiers, Digital Scoreboards, FM transmitters, and more!
🎶 Explore endless possibilities at our new store.