


Simplest DIY clap switch- Assembly tutorial

If you have come to this page from a search engine, please check this article to know about clap switch. Follow the given steps to assemble the DIY clap switch.
Step 1:Collect all the required components for assembling the kit.
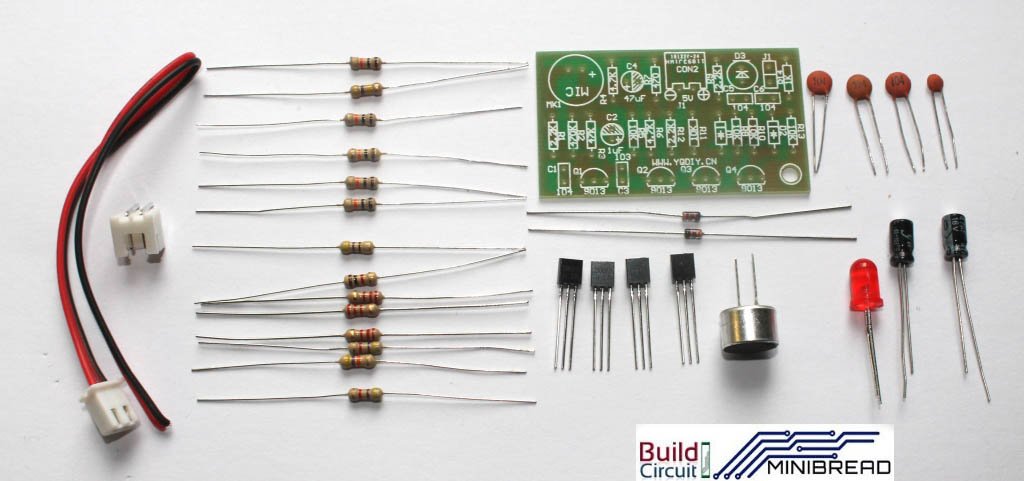
Step 2: Read and confirm the specifications of the components.

Step 3: Insert all the resistors in its respective place according to its specifications.
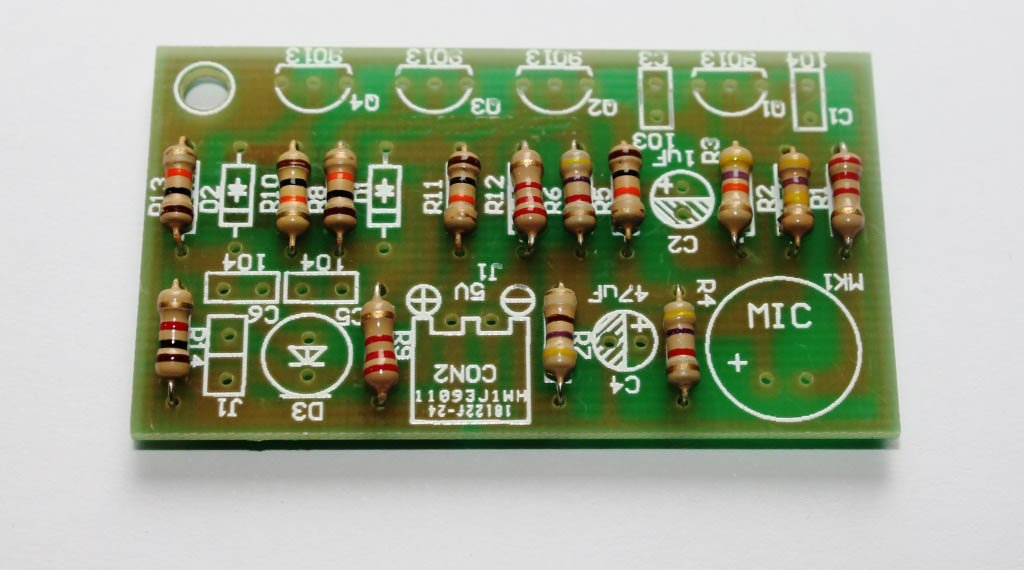
Step 4: Insert the ceramic capacitors into the board according to its labelled specification.
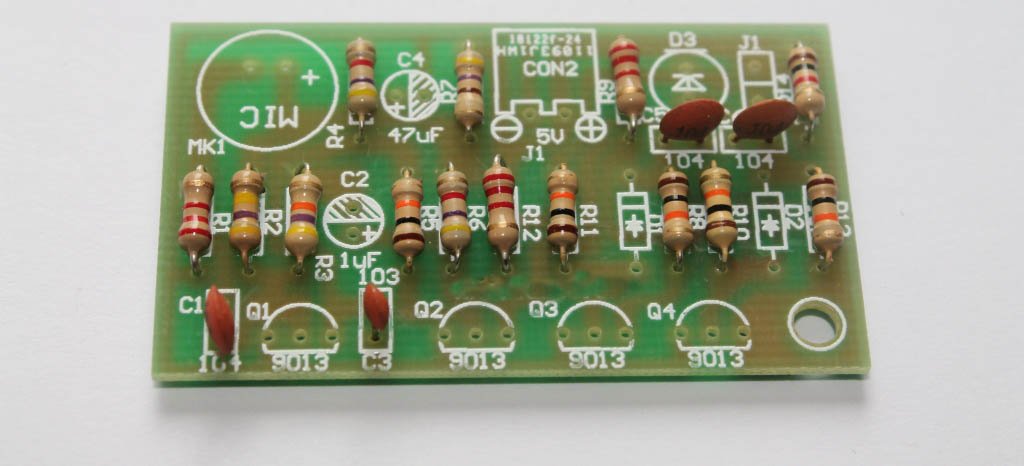
Step 5: Insert the diode in its respective place.

Step 6: Insert the four transistors in the board.

Step 7: Place electrolytic capacitors according to its specification.

Step 8: Insert mic and LED into its place in the circuit board.
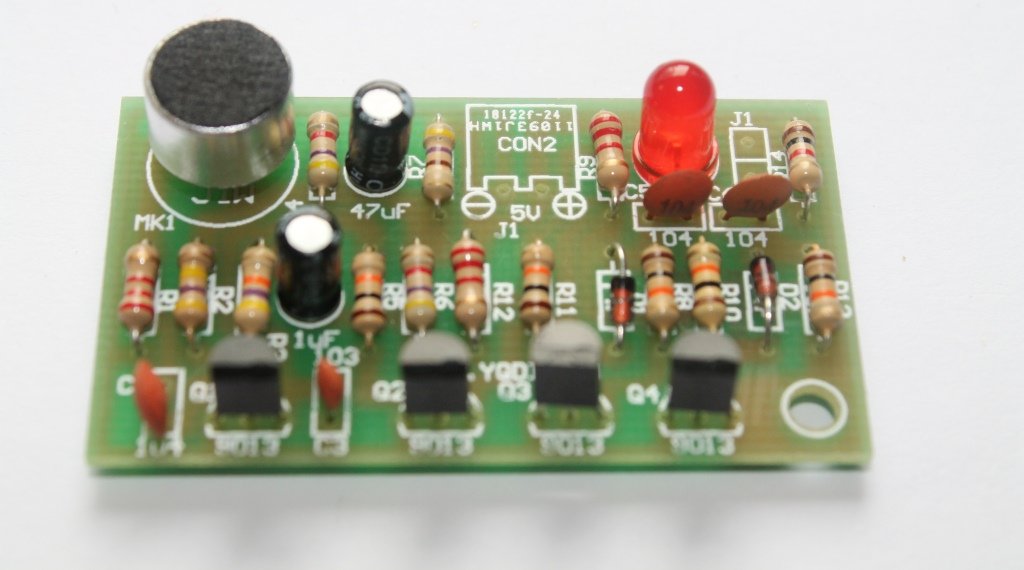
Step 9: Connect 2 pin JST connector in the circuit.

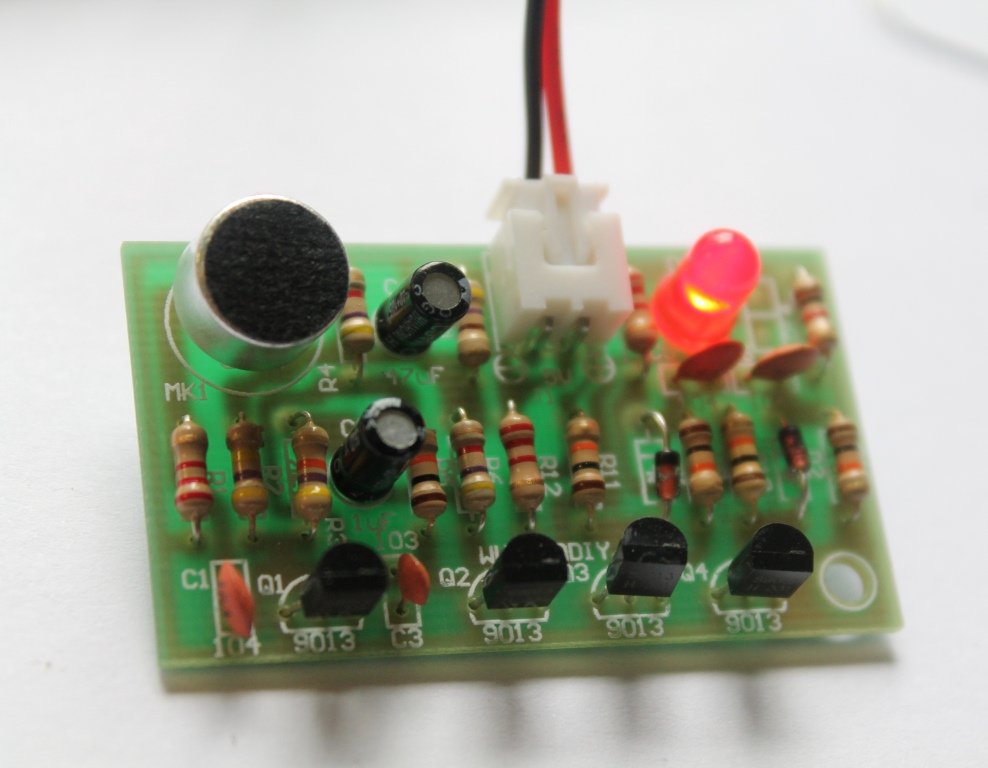
Step 10: Clap switch in action.
Video:

🛠️ Dive into our collection of DIY Kits, 🔊 Audio Amplifiers, Digital Scoreboards, FM transmitters, and more!
🎶 Explore endless possibilities at our new store.


which transistors did you use here?
I used BC547